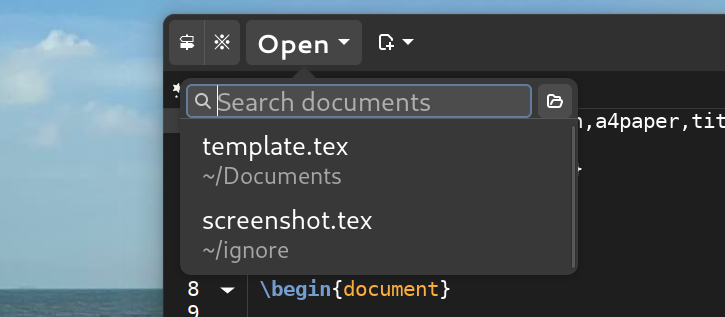
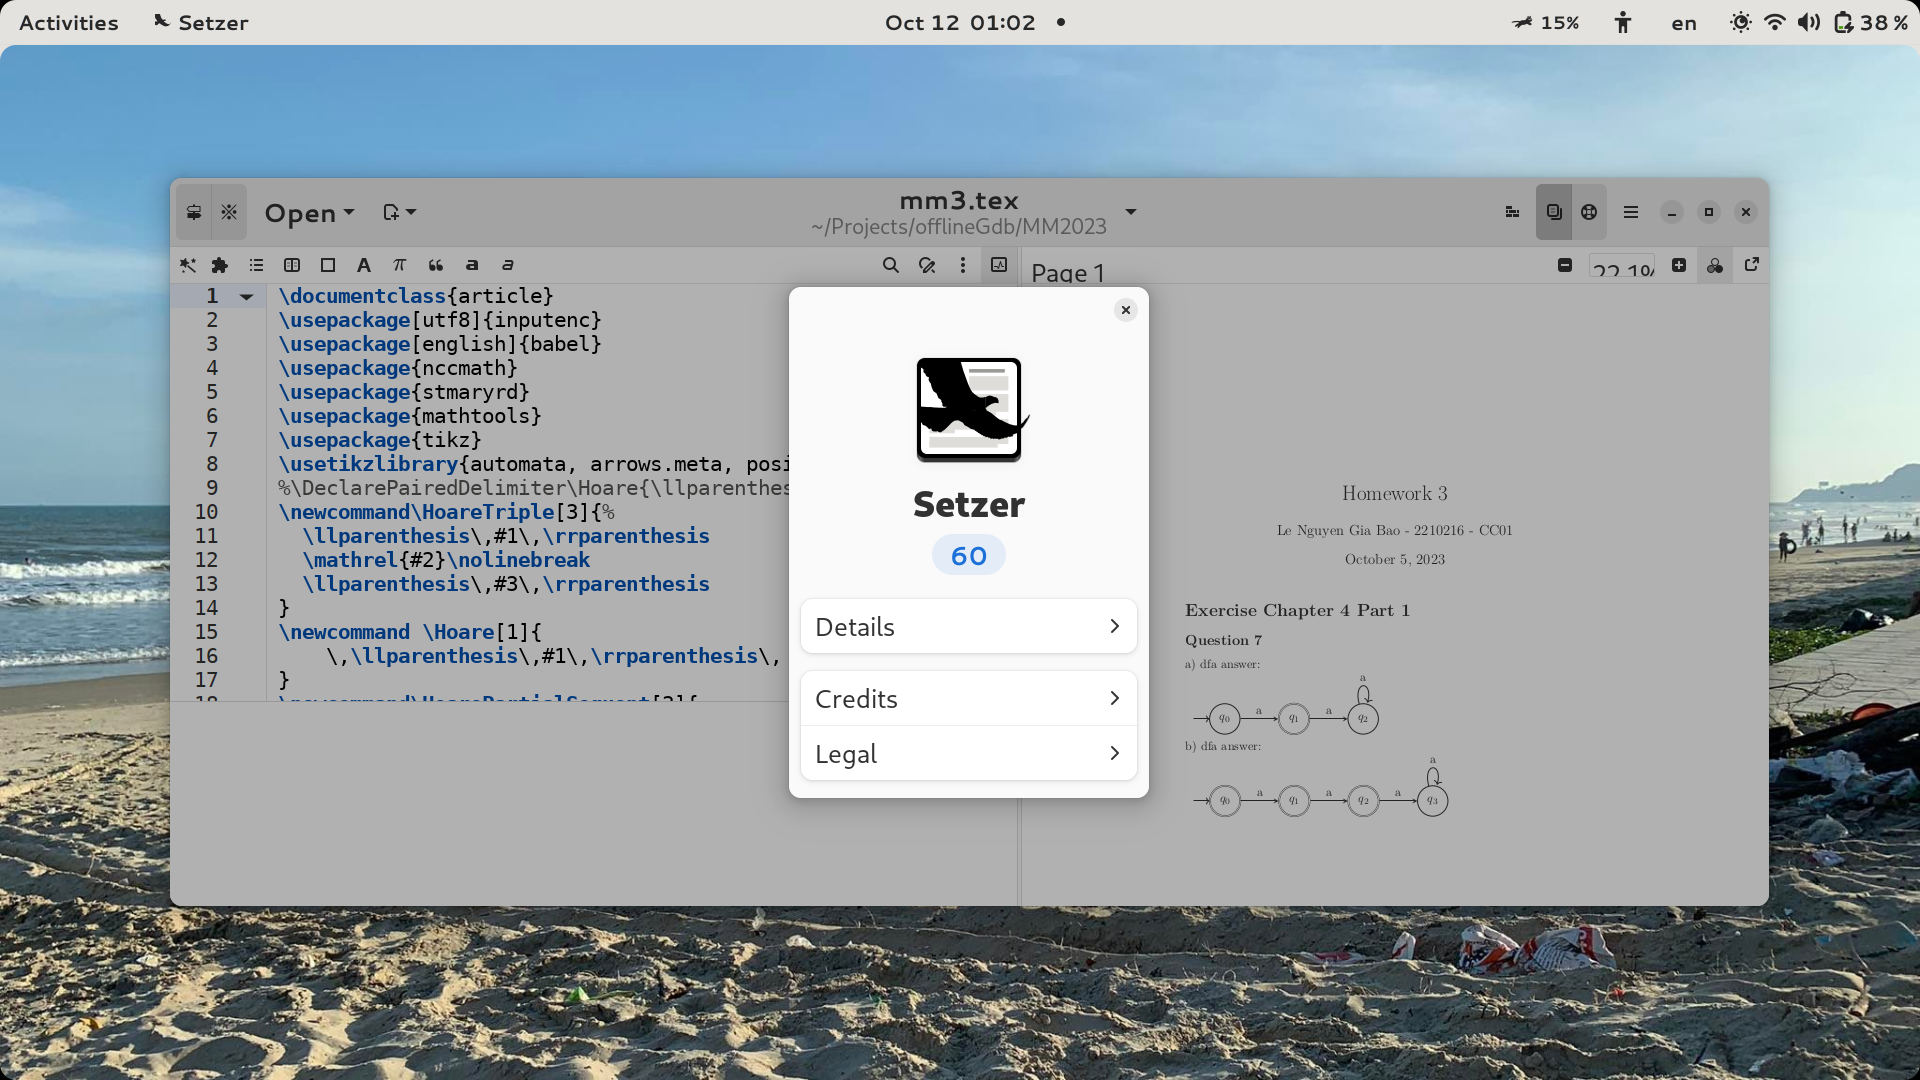
Last time we left off with the Recently Opened Documents popover, also internally known as DocumentChooser. I’d say that it is “usable” now, although some improvements can be made upon this implementation of mine. It’s online and can be found here.
This version of DocumentChooser is mostly borrowed from GNOME Text Editor’s OpenPopover widget. A key difference is that this one utilizes GListView with the navigation-sidebar style, whereas Text Editor used GListBox. GListView is a new addition to GTK4. Unless we need the boxed-list style exclusively from GListBox (in this case we don’t), GListView should be more optimal (since it is a recyclable list widget whereas GListBox isn’t) and it has the navigation-sidebar style which fits this situation better, so less style gymnastics.
I’ll take this opportunity to explain the process, how I get this version of the popover (and other versions of other widgets) implemented!
The Process
Design
First, I must put widgets together in order to create one composite DocumentChooser widget. But not code directly into Setzer’s code base, because building a whole project takes time + integration issues. I must develop the widget first in a separate environment. To that end, I used Workbench.
One slight issue is that PyGObject is not available in Workbench, as of the time of this writing. So I write the widget first in JavaScript then translate to Python.
A twist in prototyping widgets for Setzer is that I don’t use an interface description file to lay out the widgets. Basically, in GTK you can design a widget using XML or Blueprint which saves a lot of time. But Setzer codebase uses neither. For the translation process to be as direct as possible, I don’t design using interface description during prototyping. This means a lot of typing - everything must be done by application code.
const vbox_left = new Gtk.Box();
vbox_left.set_halign(Gtk.Align.FILL);
vbox_left.set_hexpand(true);
vbox_left.set_orientation(Gtk.Orientation.VERTICAL);

const file_name = new Gtk.Label();
file_name.set_label("test.txt");
file_name.set_halign(Gtk.Align.START);
file_name.set_ellipsize(Pango.EllipsizeMode.END);
file_name.add_css_class("file_name");
vbox_left.append(file_name);

file_path = new Gtk.Label();
file_path.set_label("~/Projects/test.txt");
file_path.set_halign(Gtk.Align.START);
file_path.set_ellipsize(Pango.EllipsizeMode.END);
file_path.add_css_class("dim-label");
file_path.add_css_class("file_path");
vbox_left.append(file_path);
Application Code (JavaScript)
Functionality
So, I design the widget like that. Then I add functionalities to the widget. Make buttons work, make elements use data from sources.
Interface consistency
One of the challenges when developing in a project that you don’t own is that you must adapt to how the system is already working. The original DocumentChooser widget provides a very specific interface for other components to use. And it was set up in a very specific manner. So we should uphold the same interface/procedure.
For example, the presenter code includes a reference view to the widget we’re developing. Here, we expect to be able to connect signals with view.connect, to access the search bar widget with view.search_bar, to access the button that opens file dialog with view.other_documents_button. Also, a base GtkPopover interface, since the original widget subclasses GtkPopover. And more.
class DocumentChooserPresenter(object):

    def __init__(self, workspace):
        # ...
        # get the DocumentChooser widget
        self.view = ServiceLocator.get_main_window().headerbar.document_chooser
        # `view` implements GObject
        self.view.connect('closed', self.on_document_chooser_closed)
        # `view` export its children widget `search_entry` and `other_documents_button`
        self.view.search_entry.connect('search-changed', self.on_document_chooser_search_changed)
        self.view.other_documents_button.connect('clicked', self.on_other_docs_clicked)

    def on_stop_search(self, search_entry):
        # `view` also implements GtkPopover
        self.view.popdown()
The original implementation of view is something like this.
Our new (mock-up) implementation will look and act very differently while trying to maintain this interface.
class OtherDocumentsWrapper extends Gtk.Stack {
  constructor() {
    // ...
    this.states = [];
    const button_state_available = new Gtk.Button;
    this.states.push(button_state_available);
    // ...
  }

  // new method
  set_state(state) {
    switch (state) {
    case 'state_available':
      // ...
    case 'unknown':
      // ...
    }
  }

  // adapt to the GtkButton interface
  connect(signal, handler) {
    if (signal === 'clicked') {
      for (const button of this.states) {
        button.connect(signal, handler);
      }
    } else {
      // ...
    }
  }
}

class DocumentChooser extends GObject.Object {
  constructor() {
    // ...
    this.search_entry = new Gtk.SearchEntry;
    this.other_documents_button = new OtherDocumentsWrapper;
    this.widget = new Gtk.Popover;
  }

  popdown() {
    this.widget.popdown();
  }
}
So, the interfaces of view, view.search, and view.other_documents_button are the same, but their internals are completely different.
For example, according to how presenter code uses view, view should have the GtkPopover interface. Our new implementation tries to satisfy this requirement, but in a different way compared to how the original implemnetation does it. Originally, DocumentChooser inherits GtkPopover. Our new implemenation does not inherit but only mimick GtkPopover aka we extend via composition instead of inheritance.
Similarly, in our new implementation other_documents_button is not a GtkButton at all, but a GtkStack. I only faked a GtkButton interface.
But why going through all of this trouble? While it is not required that the new code is the same as the old code, much resemblance is appreciated. This will mean less refactoring when the fork is merged into origin. Even when the differences don’t cause merge conflicts, it still helps code readers.
Integration
Finally I implement the widget in Setzer using the prototype as reference. Because Python and JavaScript are “higher-level languages”, and we’ve maintained a relatively similar interface for the new component, so the translation is mostly 1-to-1. Some changes I must make are:
Hashmap. Objects in JavaScript are maps by default, whereas in Python I must use dictionary. It’s not as convenient to use dictionary in Python as to use objects in JavaScript. When possible, prefer tuple over dictionary.
Inline closures. More of a characteristic of Setzer’s codebase. Functions should not be defined inline. The number of parameters also matter. Python will throw exception if function signatures do not match.
Example Python signal connection code. Handler code isn’t written inline. Technically, inline functions can be defined, but they are not lambdas so they are not anonymous, must be named, very cumbersome.
Testing
Nah. At least, the implementation is quite straight-forward; nothing complicated is running behind the scenes.
Product
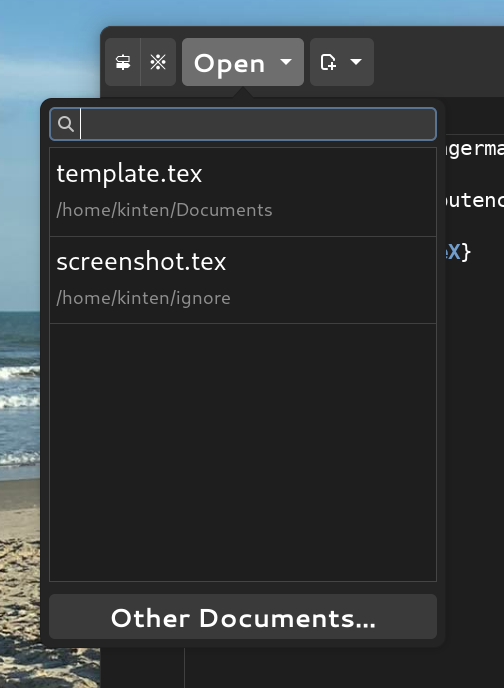
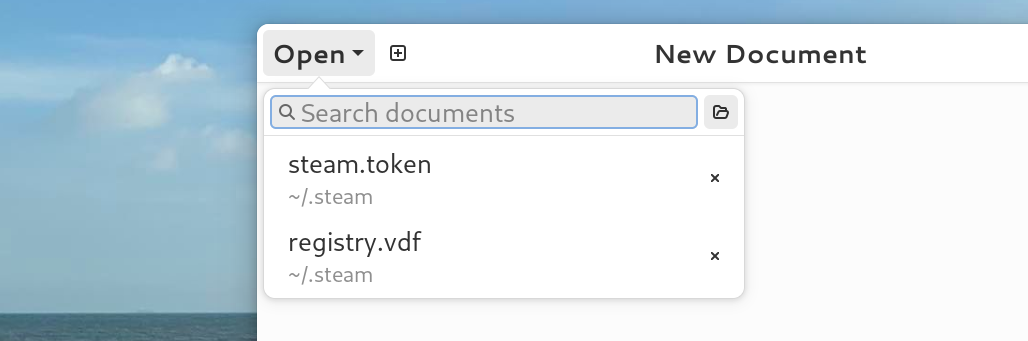
Recently Opened Documents popover - before
Walkthrough of the new iteration of the Recently Opened Documents popover
Reservations
I used GSignal instead of Setzer’s Observable as the signal system for this widget. I’m more familiar with GSignal, but I feel like I’ve could have taken some risks so that this widget can fit in better.
The style isn’t the same. Text Editor uses GListBox while this implementation uses GListView. The latter should be superior in terms of performance because it’s a recyclable list, but we don’t get the same exact same visual details. The hover effect is slightly off, for example.
Other Updates
I’ve finished working on DocumentChooser for a few weeks now. I’ve been working on other widgets, but progress has been slow due to work at university.
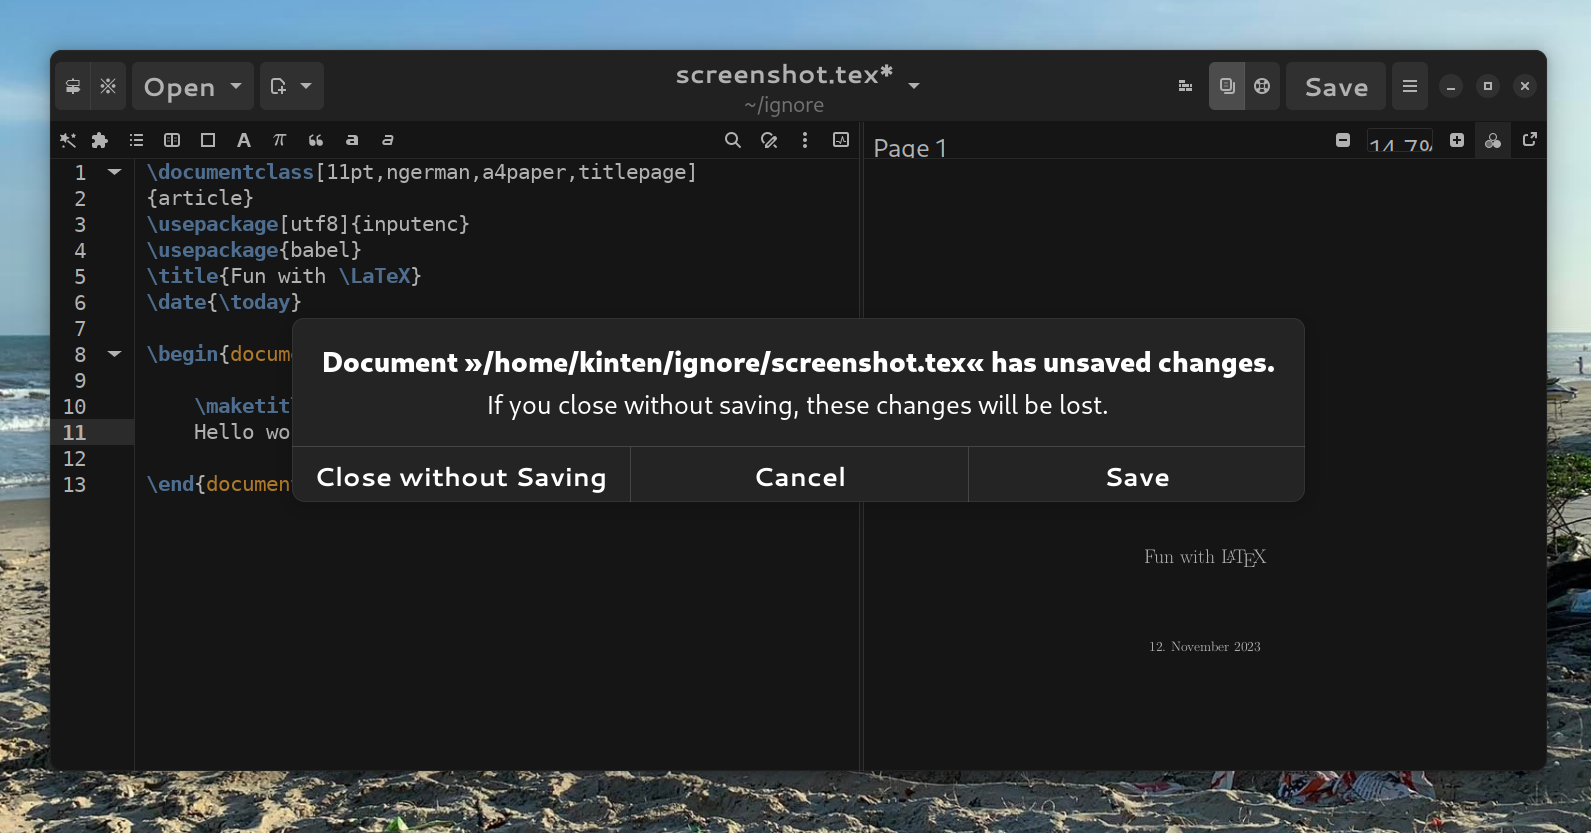
Close Confirmation Dialog - before
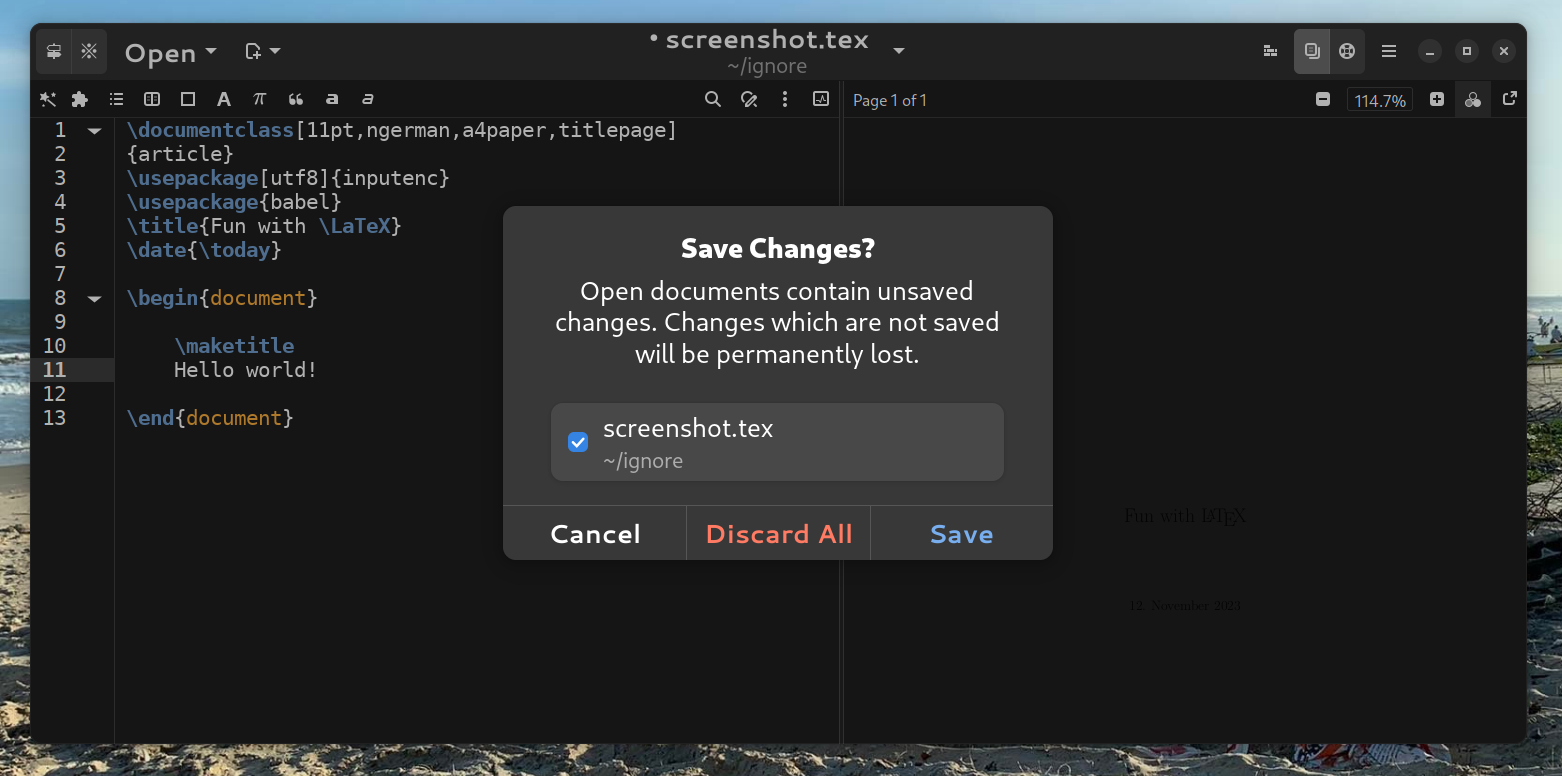
Close Confirmation Dialog - after
When I was working on it I found a pretty critical bug, apparently the saving functionality for this dialog has not been working at all. Guess no one noticed because most users would cancel the dialog when they realize there are unsaved changes. Anyway, I filed a PR and it was merged.
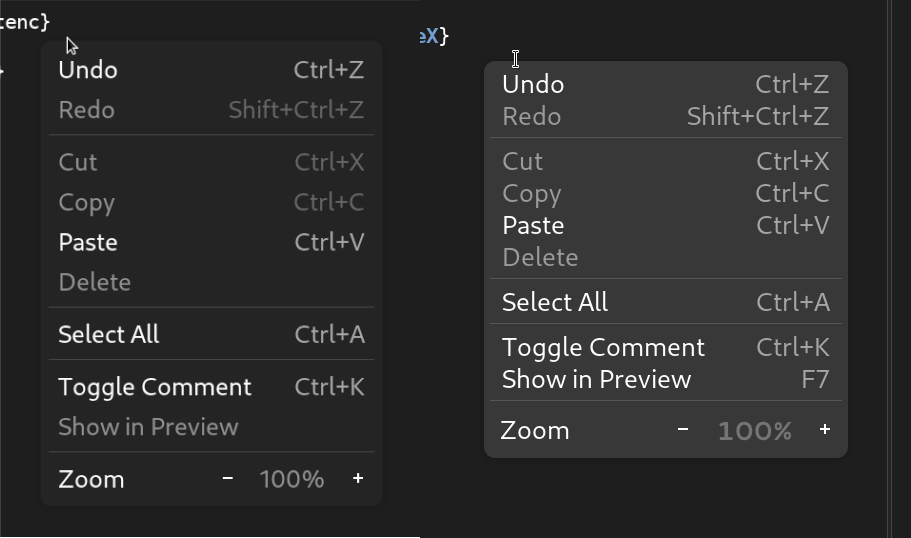
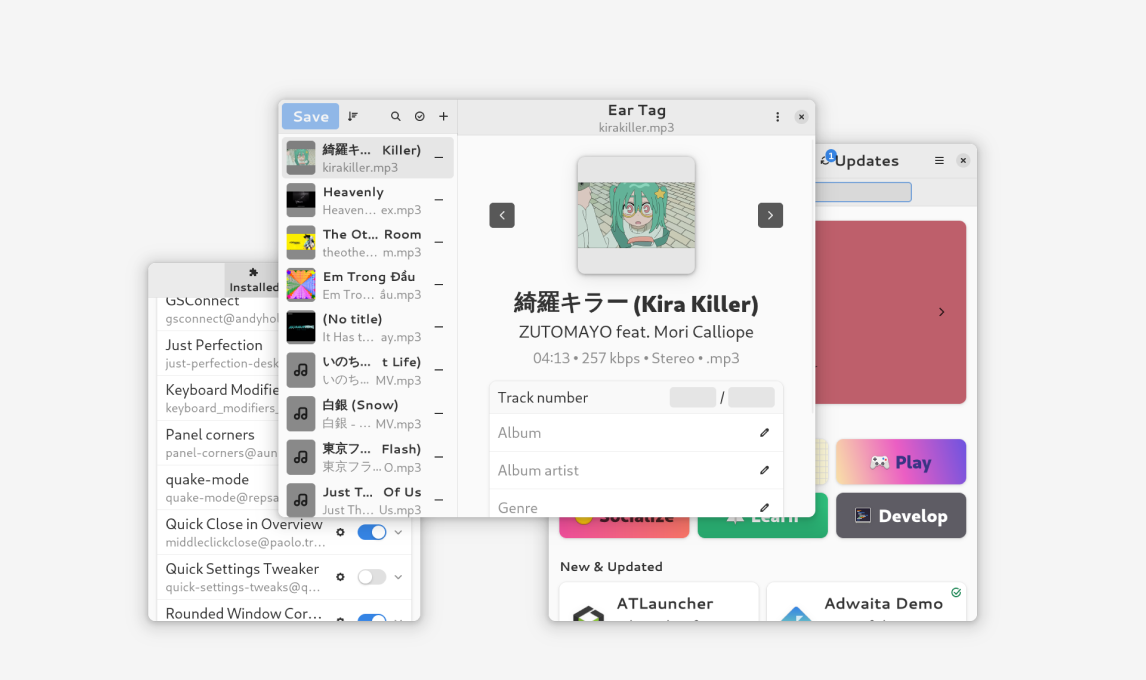
Context Menu - before and after
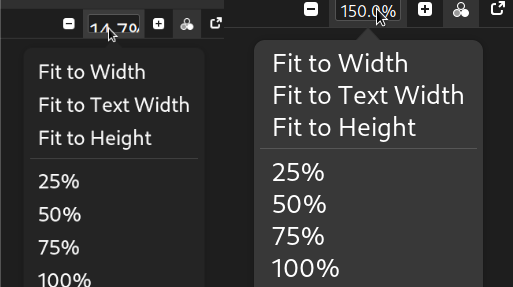
Zoom Menu - before and after
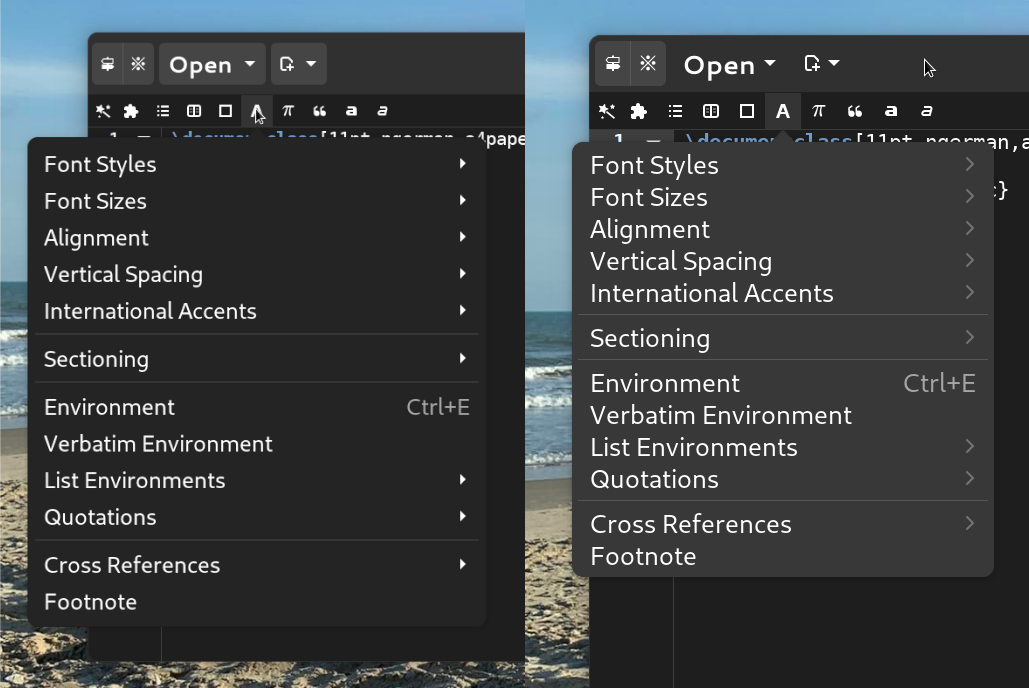
Shortcuts Bar Menus - before and after. The bar itself is another can of worm.
The Future
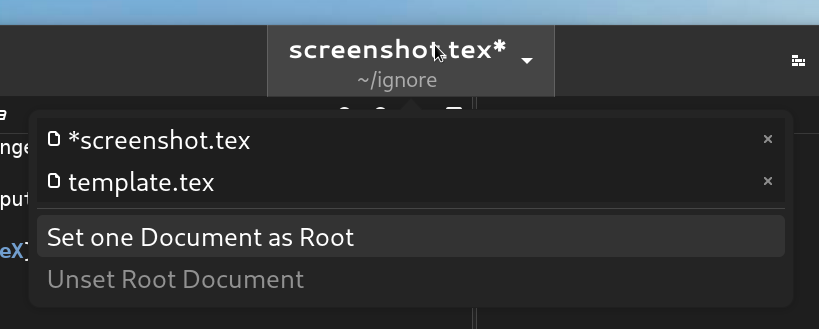
Next time will be OpenDocsPopover. It’s a popover where you manage tabs aka current session.
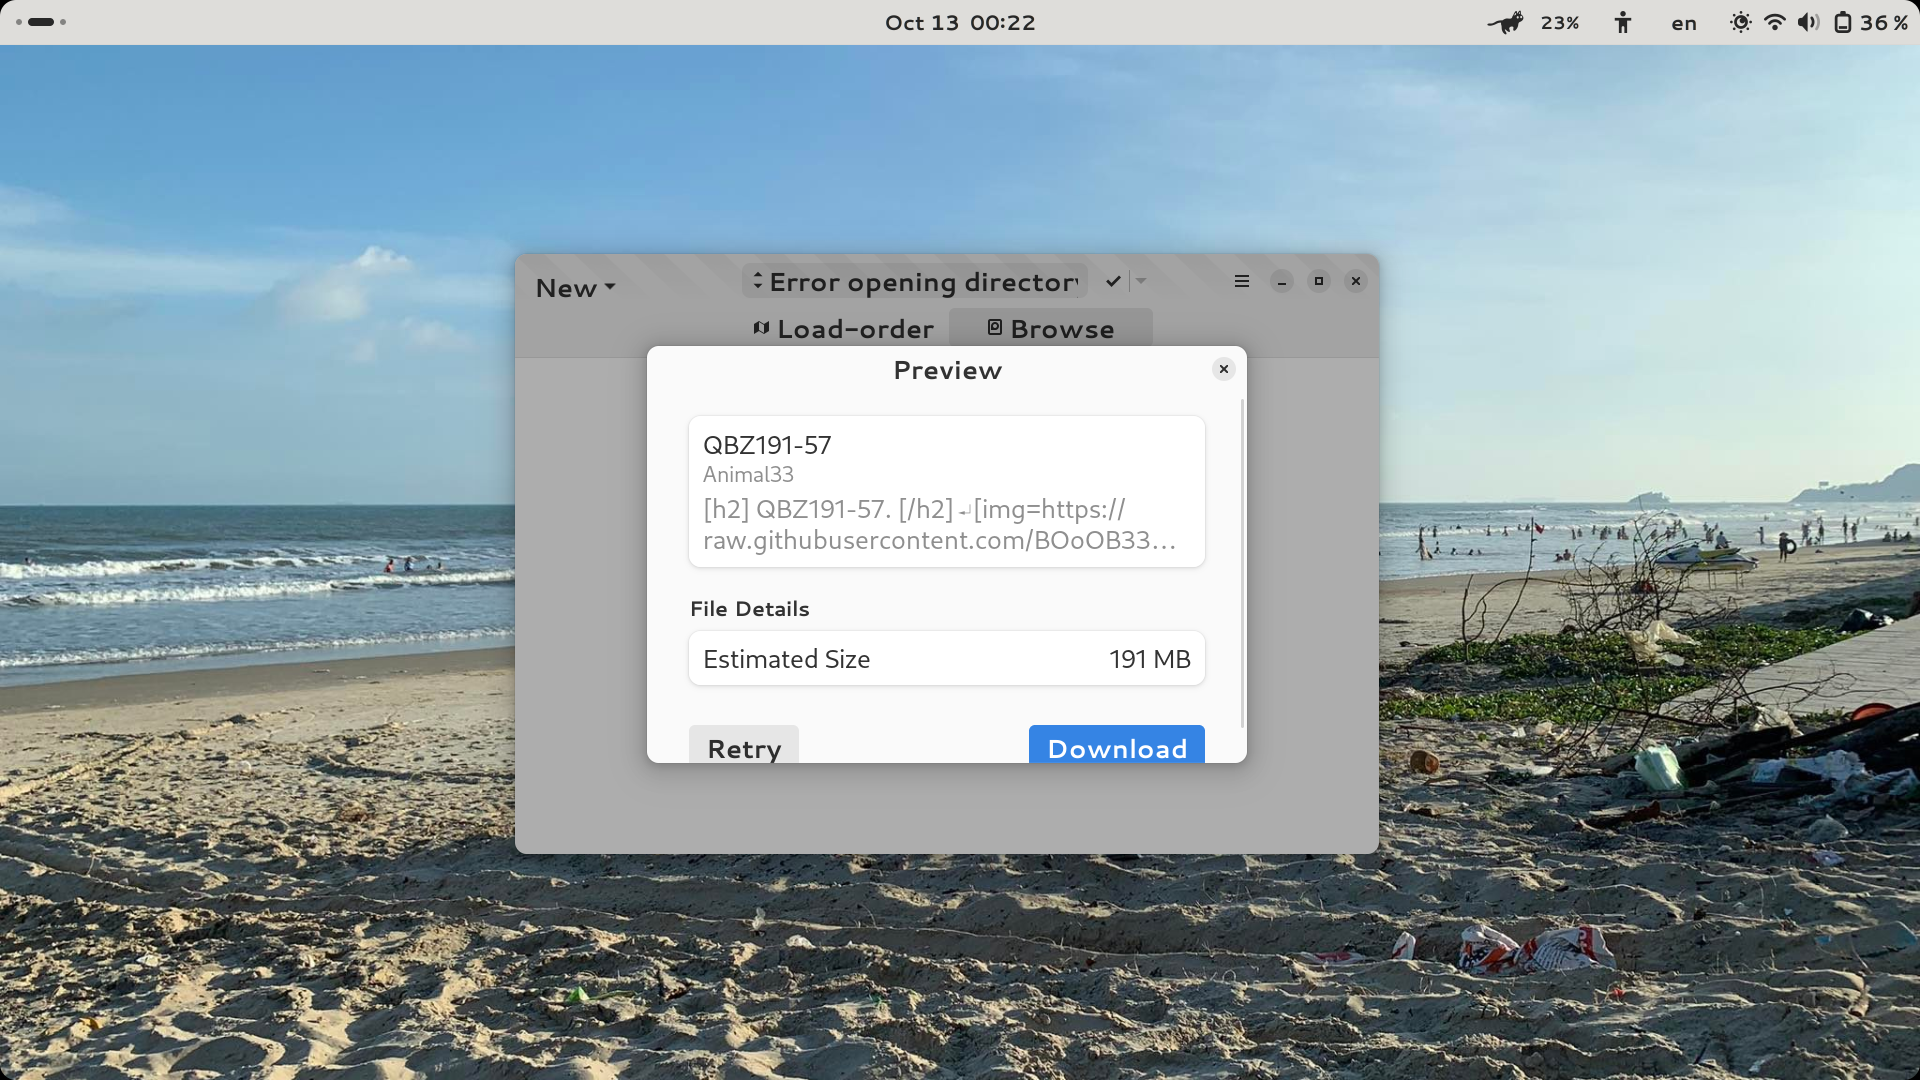
Current iteration of the OpenDocsPopover widget
I’ve been working on it on and off for quite some time and it has been hard. Main issue is that Setzer has its own popover builder tool, one which I had to remake/extend. Original popovers use custom widgets, custom stylesheets and such likes, so with any visual updates to the GTK framework the visuals all break down. This version of the popover builder will be a wrapper over GTK’s GioMenu API, no more custom solution. Only problem is that this requires some interface gymnastics - a lot.
Shortcutbar
A menubar with lots of commands and menus is not very GTK. While it isn’t relatively easy porting popovers to use GMenu, changing the bar itself isn’t. Changing the bar will involve a whole redesign.
Wizards
A lot of layout patterns seem to have been borrowed from QT. Also won’t be easy to overhaul. These include the New Document window, the Add/Remove package window, the BibTex window, etc.
And there are many other subjects of enhancement, but I’ll leave them for the next post.
Unrelated thoughts
The overarching theme has been to adapt to the conventions set forth by the current code base. However, I’ve found myself in situations where it’s better to just remake things.
What I’ve realized is that it’s bold to assume that the current code is working well. Sure, it works today, on your setup. But what about tomorrow, what about on my machine? Setzer was created 4 years ago in GTK3. Now we use GTK4. My DE setup has libadwaita, and it has a tweak where all texts are enlarged. Most apps held up to these modifications, but not Setzer. Setzer seems to struggle a lot. That’s why it’s important to reinvent the wheel sometimes.
Thanks for reading this blog post! This fork is my attempt to give a libadwaita coat of paint to Setzer, you can check it out here!
In this post, I go over the history of Steam VPK and showcase some stuff behind the scene!
Before the next progress report for Steam VPK arrives, let’s talk about the history of Steam VPk.
The Shell Script Era
As mentioned in the last post, Steam VPK began life in April. However, that’s only the GJS frontend.
The actual concept of Steam VPK dates back to June 2022, almost a year before that. Initially, Steam VPK was a shell program that adds automation to my Left 4 Dead 2 modding experience. Steam VPK was a folder with GNU Make script and some shell scripts inside. Here, I can extract .vpk files into folders, then when I modify the content of these folders, I can run make then new .vpk files will be smartly created (only create if folder modified) and linked to game folder. Steam VPK made modding easier, especially for me a novice modder. As the workshop community grew, then my demands grew, so did Steam VPK. I added the ability merge .vpk files together, the ability to download workshop files, then add thumbnails to add-on files, etc. Summer that year was wild.
The C Era
When summer ended, I started my first year at university, and so no more time for Steam VPK. I did devote some time every now and then, but there are many more interesting things going on. At school I was learning computer hardwares, doing front-end web development, etc.
During this time I was planning to upgrade Steam VPK to a GTK app, written in C. I was learning C during summer and at school, so why not. But this plan really took me down to a rabbit hole. The more GTK documentation I read the more I realized how hard it is. Writing OOP code in C using the GObject Object system is essentially doing OOP but with no help from the compiler, you must understand how OO works under the hood and write a lot of boilerplate code. Like writing procedural code using assembly languages. This got me stuck for a while.
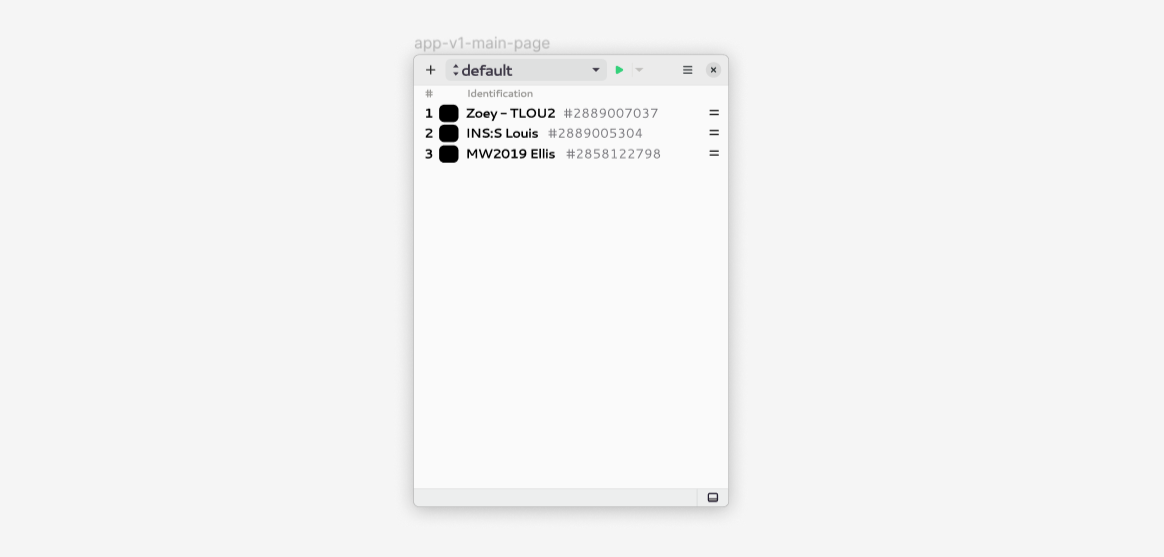
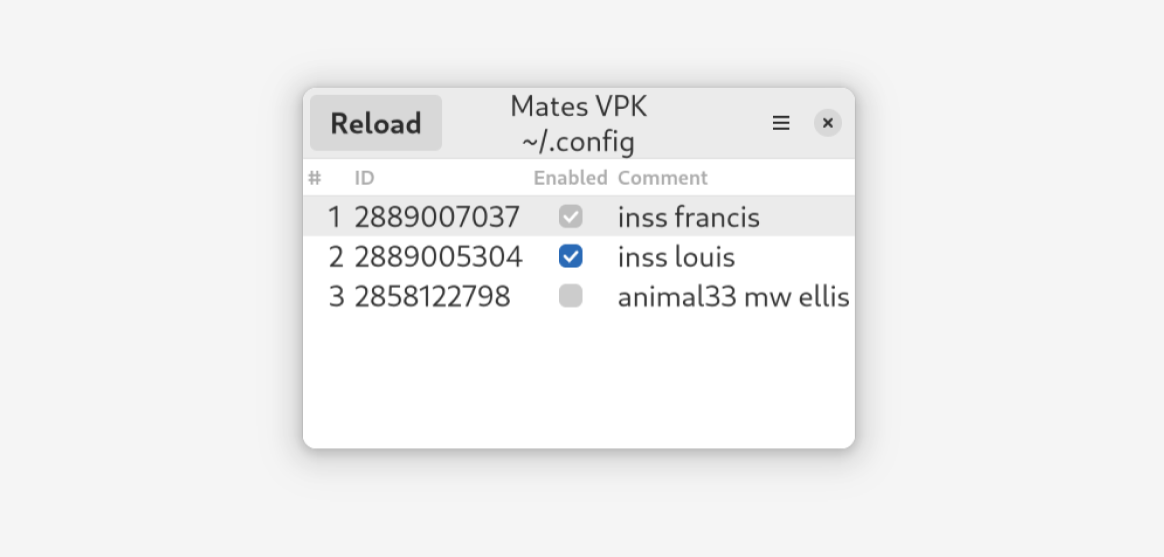
The “Hello world” version of Steam VPK, a.k.a. Mates VPK
During this time I also began using Figma to prototype UI. It remains a passion of mine to this day. Tools like Workbench have helped me prototype entire programs, but Figma gives me the freedom to draw whatever I want.
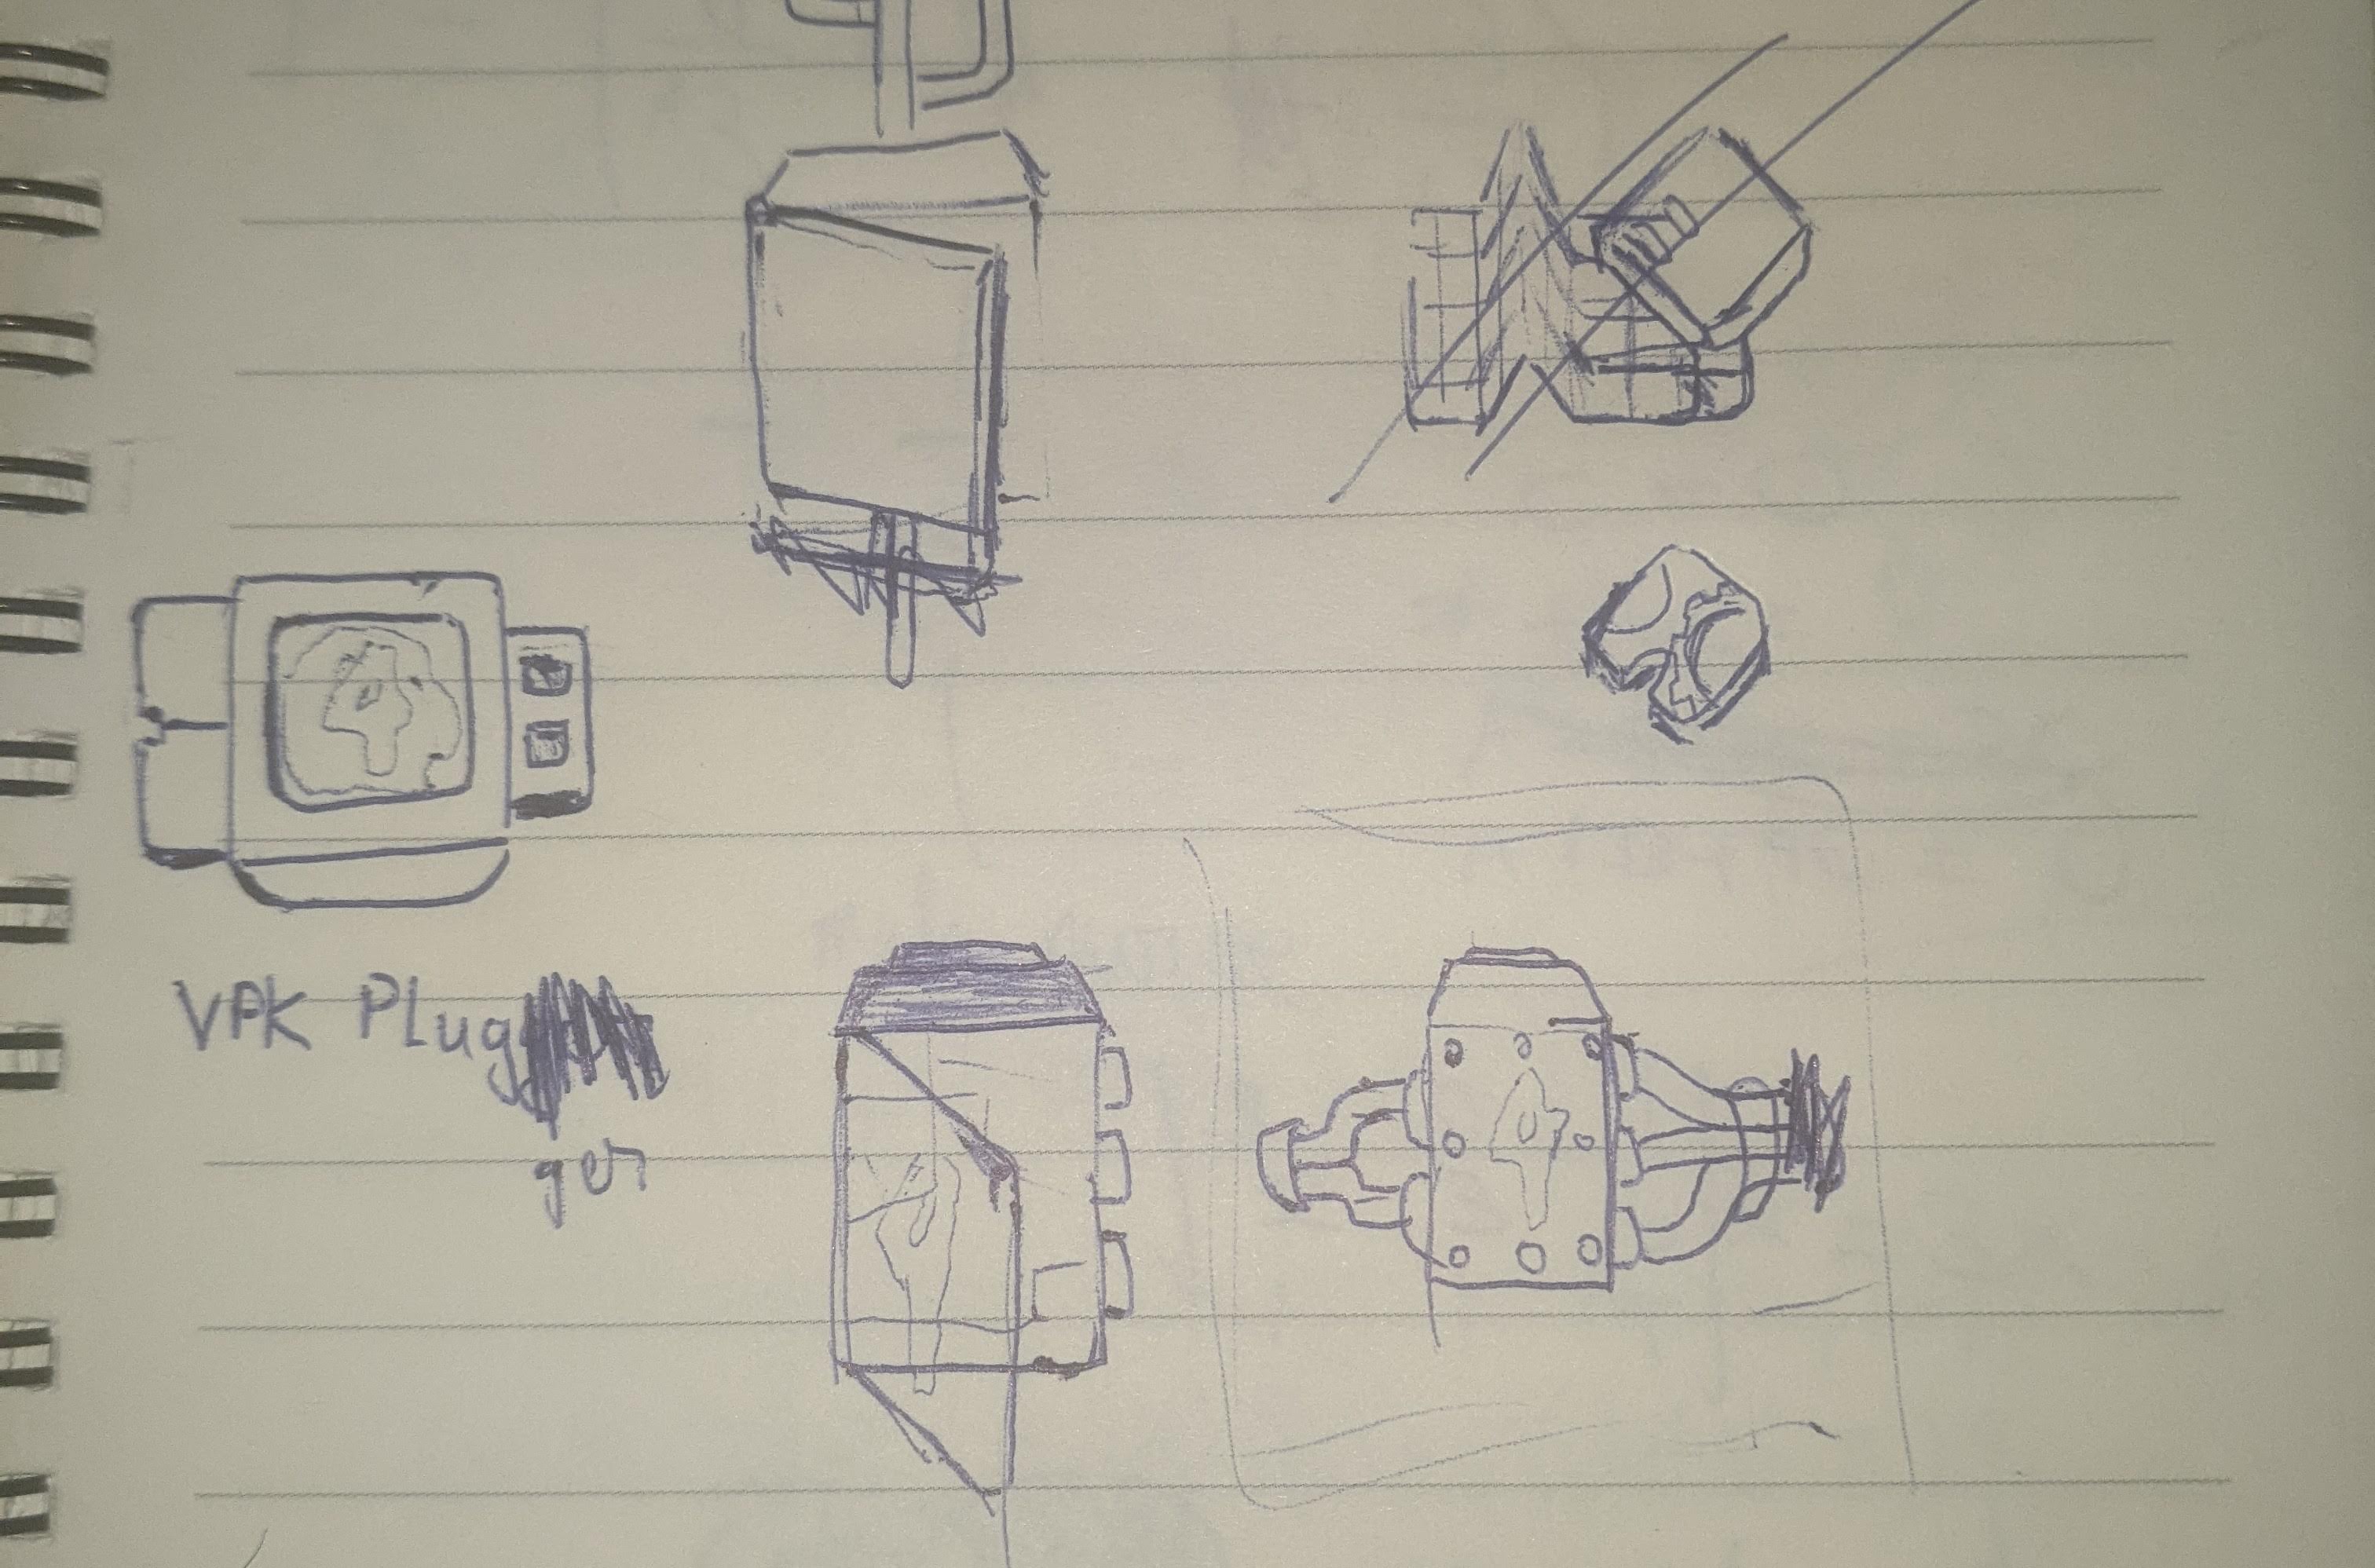
A prototype I drew in Figma
The GJS Era
At April, the storms have finally calmed. With my newfound webtech knowledge I decided to revive Steam VPK. And I’ve been working non-stop to this day. This time I used GJS, which is GTK with JavaScript binding. The JavaScript programming language really boosted productivity.
A prototype I drew in Figma
Draft logo for Steam VPK, which is a modified, L4D2-esque version of the Extension Manager logo
The Extension Manager logo in question
Drafts for the Steam VPK logo
C won’t be missed, but not because I won’t use it. There’s plan for it in the future. Steam VPK will need to have the ability to pack/unpack .vpk files, and the tool for this is best written in a lower-level language like C. Definitely not JavaScript.
The Name
I just randomly picked. steam-vpk was a folder of scripts. There’s steam because I was fiddling with mods from the Steam Workshop, and there’s vpk because that’s the archival format of the mods. Later on I’ve tried other names:
myso (it’s random)
mates-vpk (mates to give a PDA vibe)
cedabag (ceda as in CEDA, the muddy health org in Left 4 Dead 2, and bag because I used a bag analogy to describe the app; imagine a bag carrying items, then this is an app carrying add-on items).
steam-vpk just sticks; I want to honor the project’s origin.
The Others
I’m currently doing other projects as well. Steam VPK has gone on for so long and through so many changes that I now need to breathe some fresh air.
I might work on more front-ends for Steam VPK. I’m dissatisfied with the current UI. There are only so many bugs you can fix before you realize how deep-rooted some issues are, it’s down to the design/architectural level. Thankfully, the current back-end can be used. I’m glad that I separated this project into two components, the back-end and the front-end.
And there are some undisclosed apps. Only in concept phase.
Report on progress of steam-vpk, and its backend steam-vpk-server.
Today I’ve pushed some new commits to steam-vpk and to steam-vpk-server. This is one step towards implementing the Import from Workshop feature. Specifically, steam-vpk-server can now create metainfo files and index entry for an add-on item.
Of course, the journey will be long. Next will be to implement the AddonStateChanged signal. It’s unfortunate that progress has been slow.
Context
Since this is informally the first blog post of SteamVPK’s development, here’s a brief history.
Project started in April.
Around the start of August, the MVP version, unofficially known as version 0.6, was released. This version runs on GNOME 43. It’s called MVP because it’s functional: you can download add-ons from Workshop and install it to the game. Lots of bugs, doesn’t have good UX, but try a bit and it works even to this day.
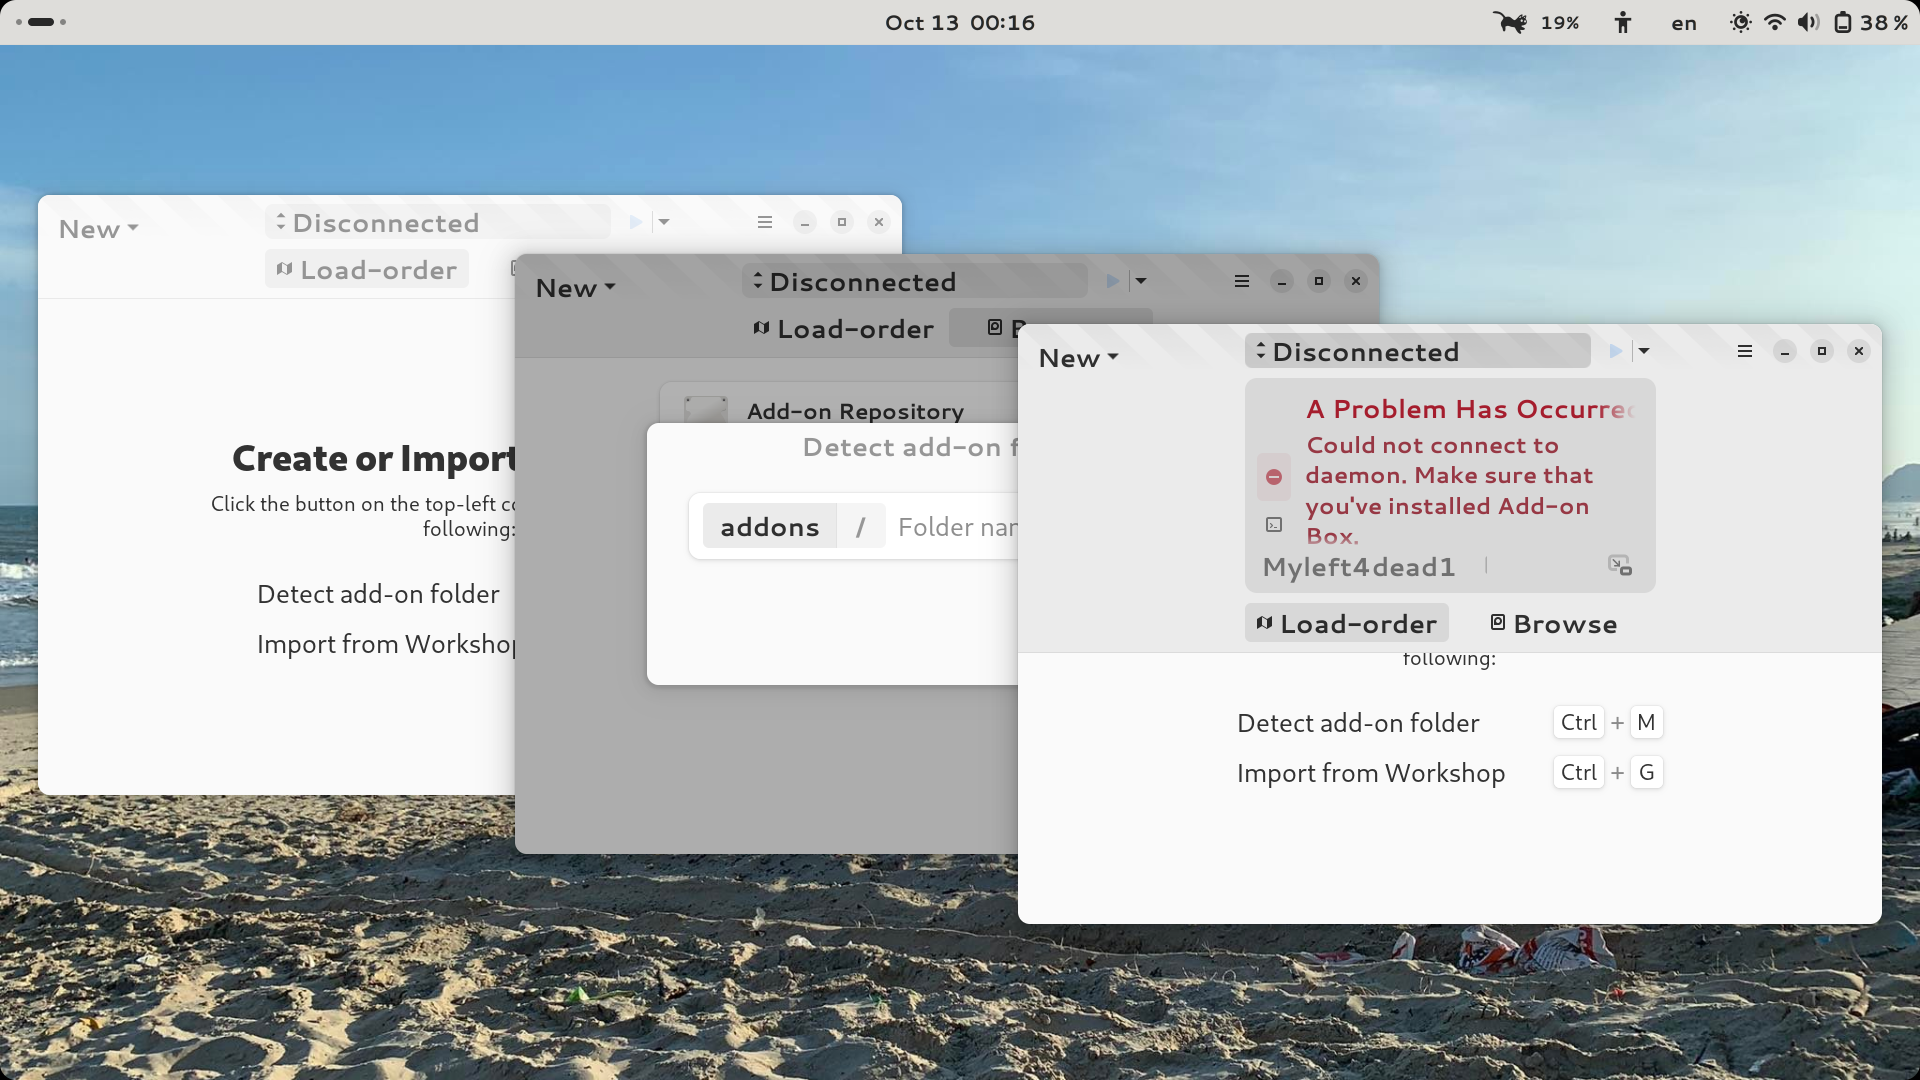
Steam VPK 0.6 on GNOME 45, UI has not been adapted to new GNOME release.
A week later I embarked on version 0.7. Nicknamed Portal, this versions separates the project into the frontend steam-vpk and the backend steam-vpk-server as it is known today.
However, a side effect of this is that the back-end is now being reworked. Not only had the backend separation broken it, but the system design was also inherently flawed and my DX was horrible.
That journey to version 0.7 continues to this day. Version 0.7 will feature new and improved front-end design, enhanced back-end performance, and just plain better system layout and code organization.
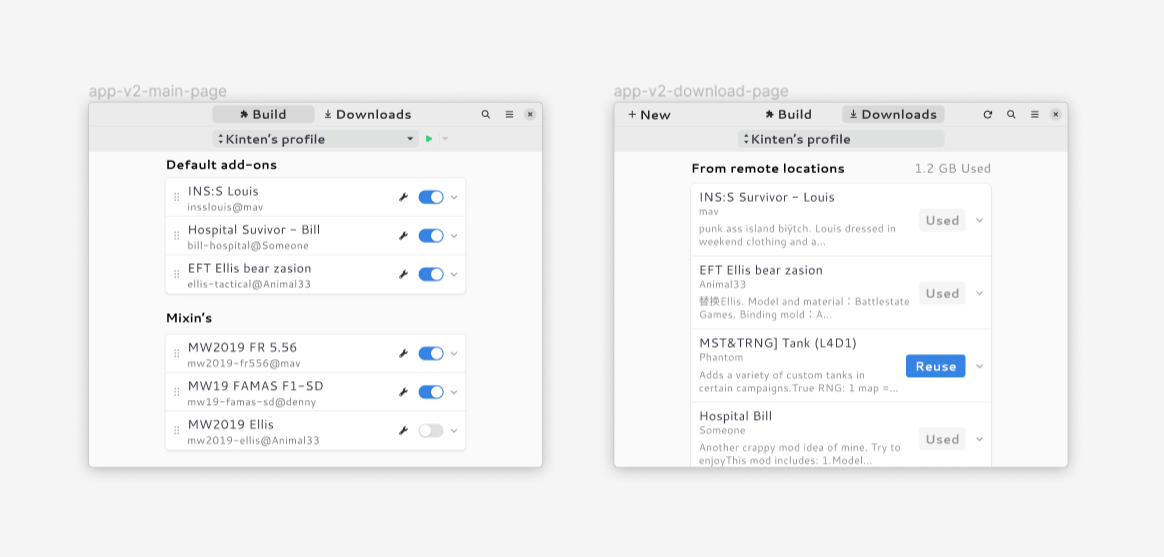
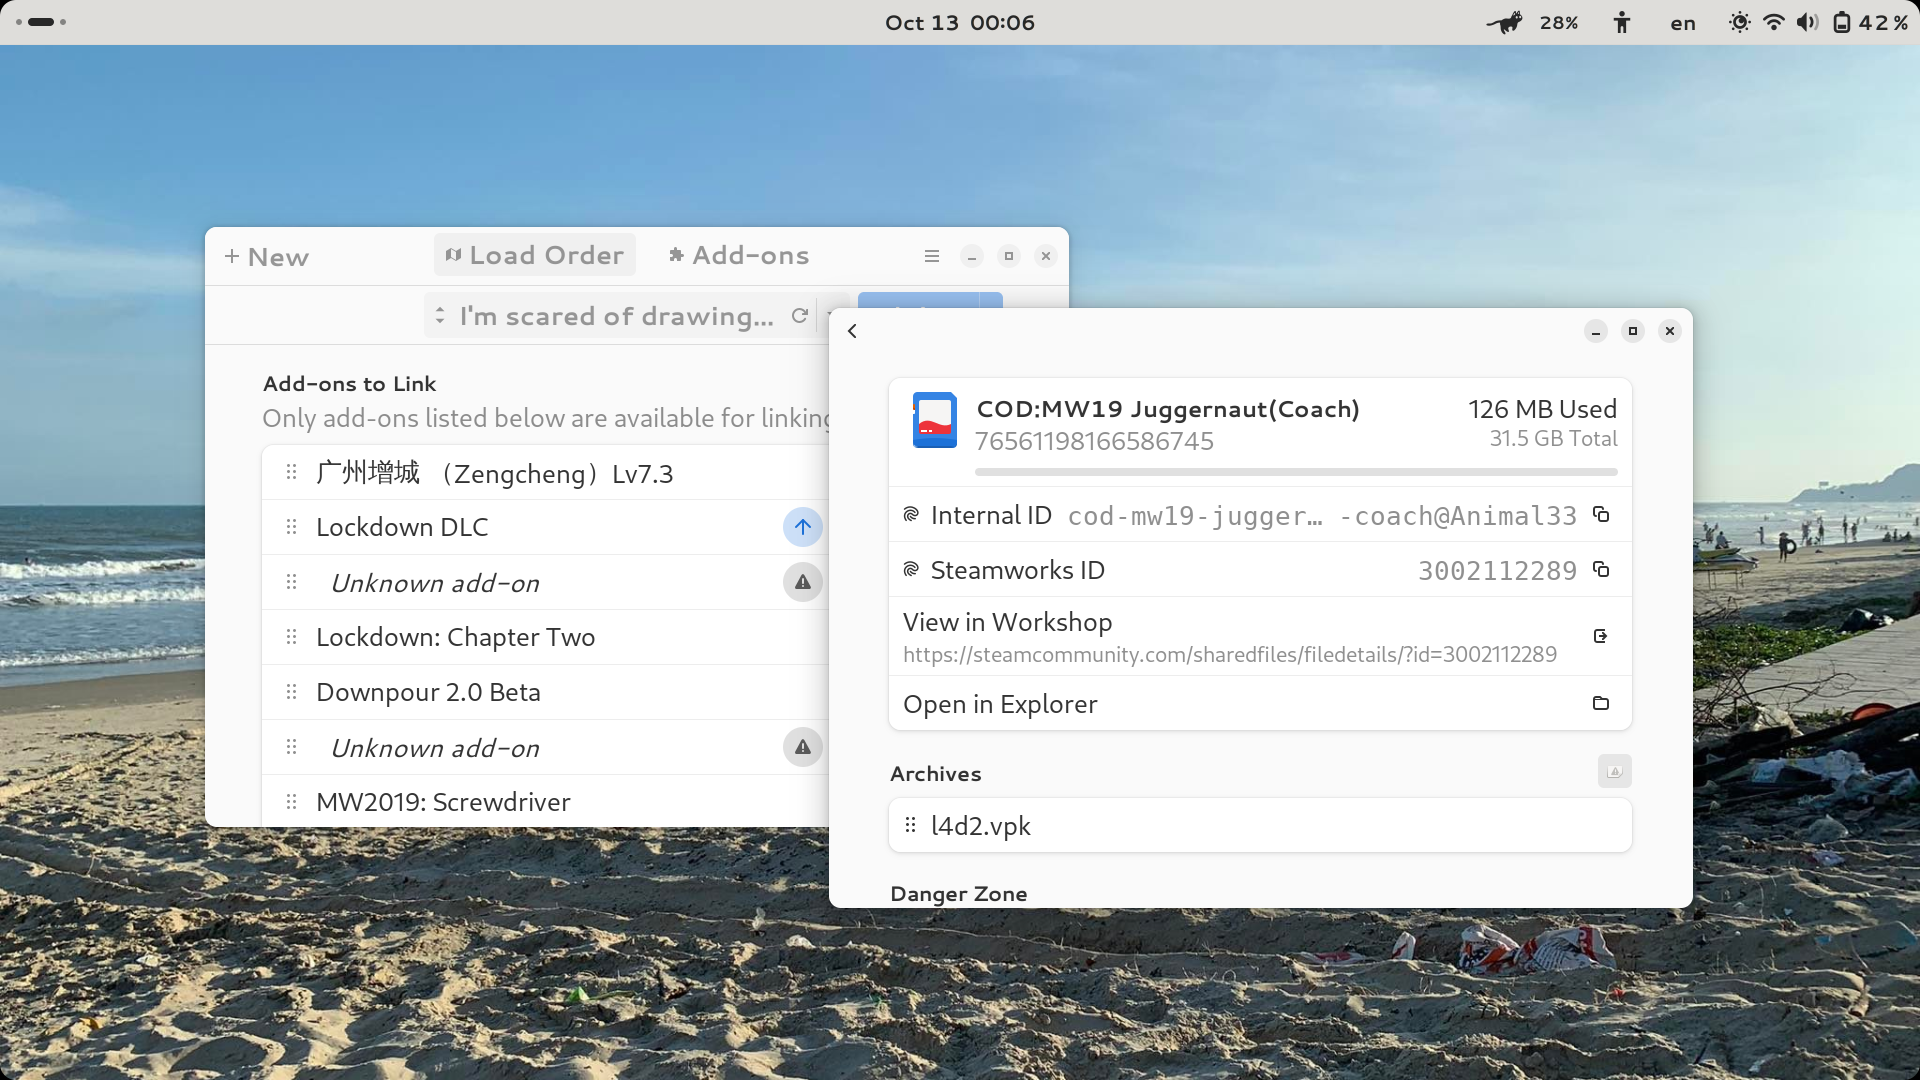
Steam VPK 0.7 on GNOME 45.
The Situation
Recently, a rework of the add-on store component removed the AddonsChanged signal in favour of AddonsStateChanged. AddonsChanged was not descriptive enough to be used in the front-end.
Both AddonsChanged and AddonsStateChanged are emitted when store membership changes. However, AddonsStateChanged will detail content changes as well. Its parameters are the id of changed add-on, and a vardict of changed props (prop name, new prop value).
Reflections
I made a bundled commit to steam-vpk-server. It’s a bad habit when I modify files too much without proper work categorization, leading to messy changes that cannot be split because they depend so much on each other.
Have mixed feelings about removing AddonsChanged, usually a deprecation flag would be enough. Now, the add-on lists in the front-end no longer works. This is supposedly a hard way of forcing changes.
Post-script
The tag 0.6 is new, literally today. This is because the MVP has been broken for a while for using a revoked Steam API token, cannot download add-ons from Workshop. I’ve recently (and rather reluctantly) traveled back in time to fix the issue and now it works again.
The Linux Experience, tập 2. This time we delve into the development of a fork of a GTK app.
Setzer is a LaTeX editor written in GTK. My only gripe with it is that its UI is somewhat outdated. To elaborate on this, I’ll have to explain (rather haphazardly) how things should be, how the modern GTK experience should be.
Nowaways, a lot of GTK apps are transitioning to “libadwaita apps”, short for modern GTK apps that use GTK4 and libadwaita. You could argue that there’s a difference between a GTK app and a GNOME app, that a GNOME app uses libadwaita and a GTK app doesn’t have to. And it’s true that ElementaryOS also uses GTK, and so is PopOS. But these days the default GTK look is synonymous with the libadwaita look (the default GTK theme is called Adwaita, duh). ElementaryOS and PopOS are outliers. So far as I can tell, Setzer goes for the default GTK look.
The Situation
Setzer has been stuck in GTK3. Only two months ago has the creator updated it to GTK4. But it still hasn’t adapted the new UI elements.
Most importantly, Setzer is not a libadwaita app. It seems that the creator uses Debian, though I don’t know what desktop environment they use exactly. I’m using Arch Linux with the desktop environment GNOME 44. Almost all apps here use libadwaita, Setzer is the only standout. From the get-go there are a lot of inconsistencies in UI. I filed an issue and it doesn’t seem like they’re interested in making UI changes. I don’t even know if they are aware of the problems here. No more talk, I’m making my own fork, slowly adapting libadwaita widgets and just generally best-practice APIs, while inventing some new stuff too (hopefully should fit well with libadwaita). You can check it here. I’ve split new features into their own branches, but a preview branch dev is available. See for yourself, all feedbacks are welcomed!
The Changes
A lot, but most are currently not worthy of preview.
Some changes, though, are drastic. Let’s make some comparisons, I’ll give you an example of how a normal implementation should be, then how Setzer did it, and how I tried to make a compromise between two versions.
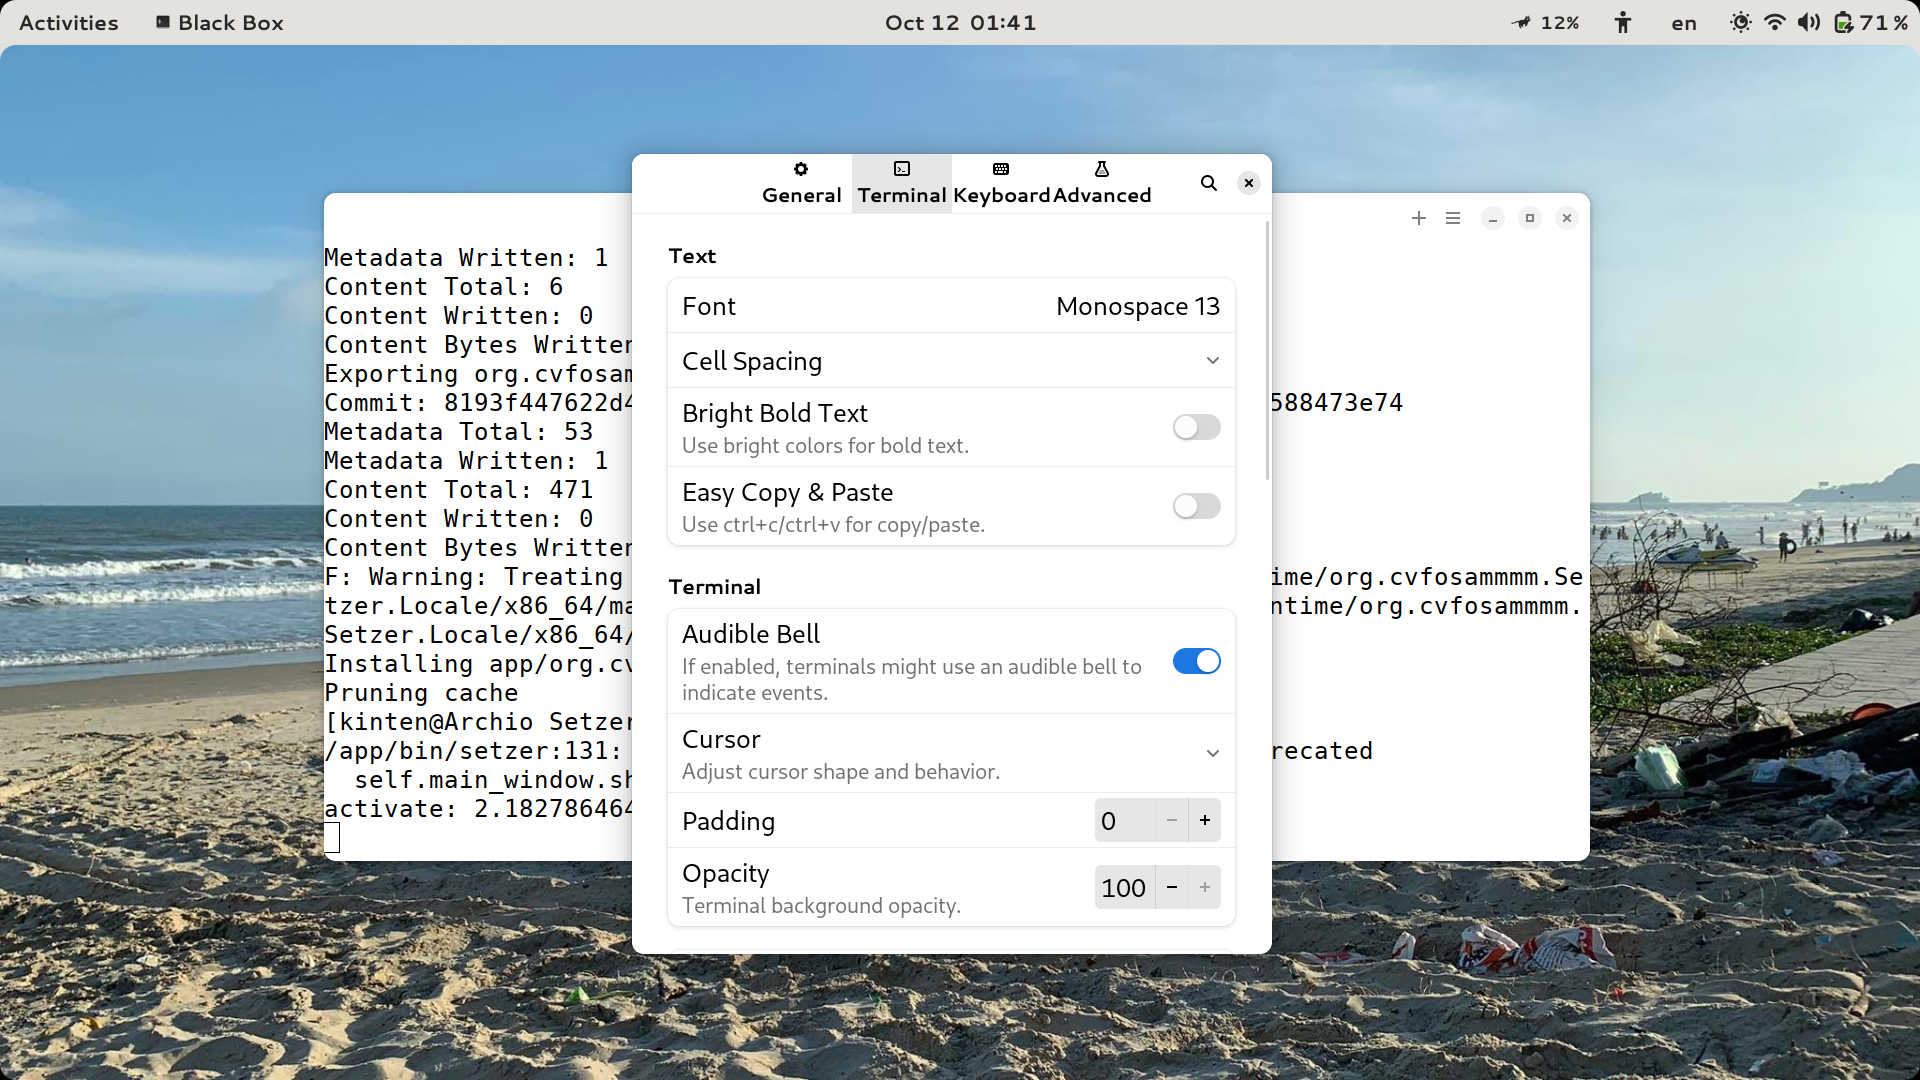
Here’s a page in the Preferences window of the GTK app Black Box (also the terminal app I used for dev!)
Preferences Window in Black Box.
And other GTK apps have this kind of Preferences window, too.
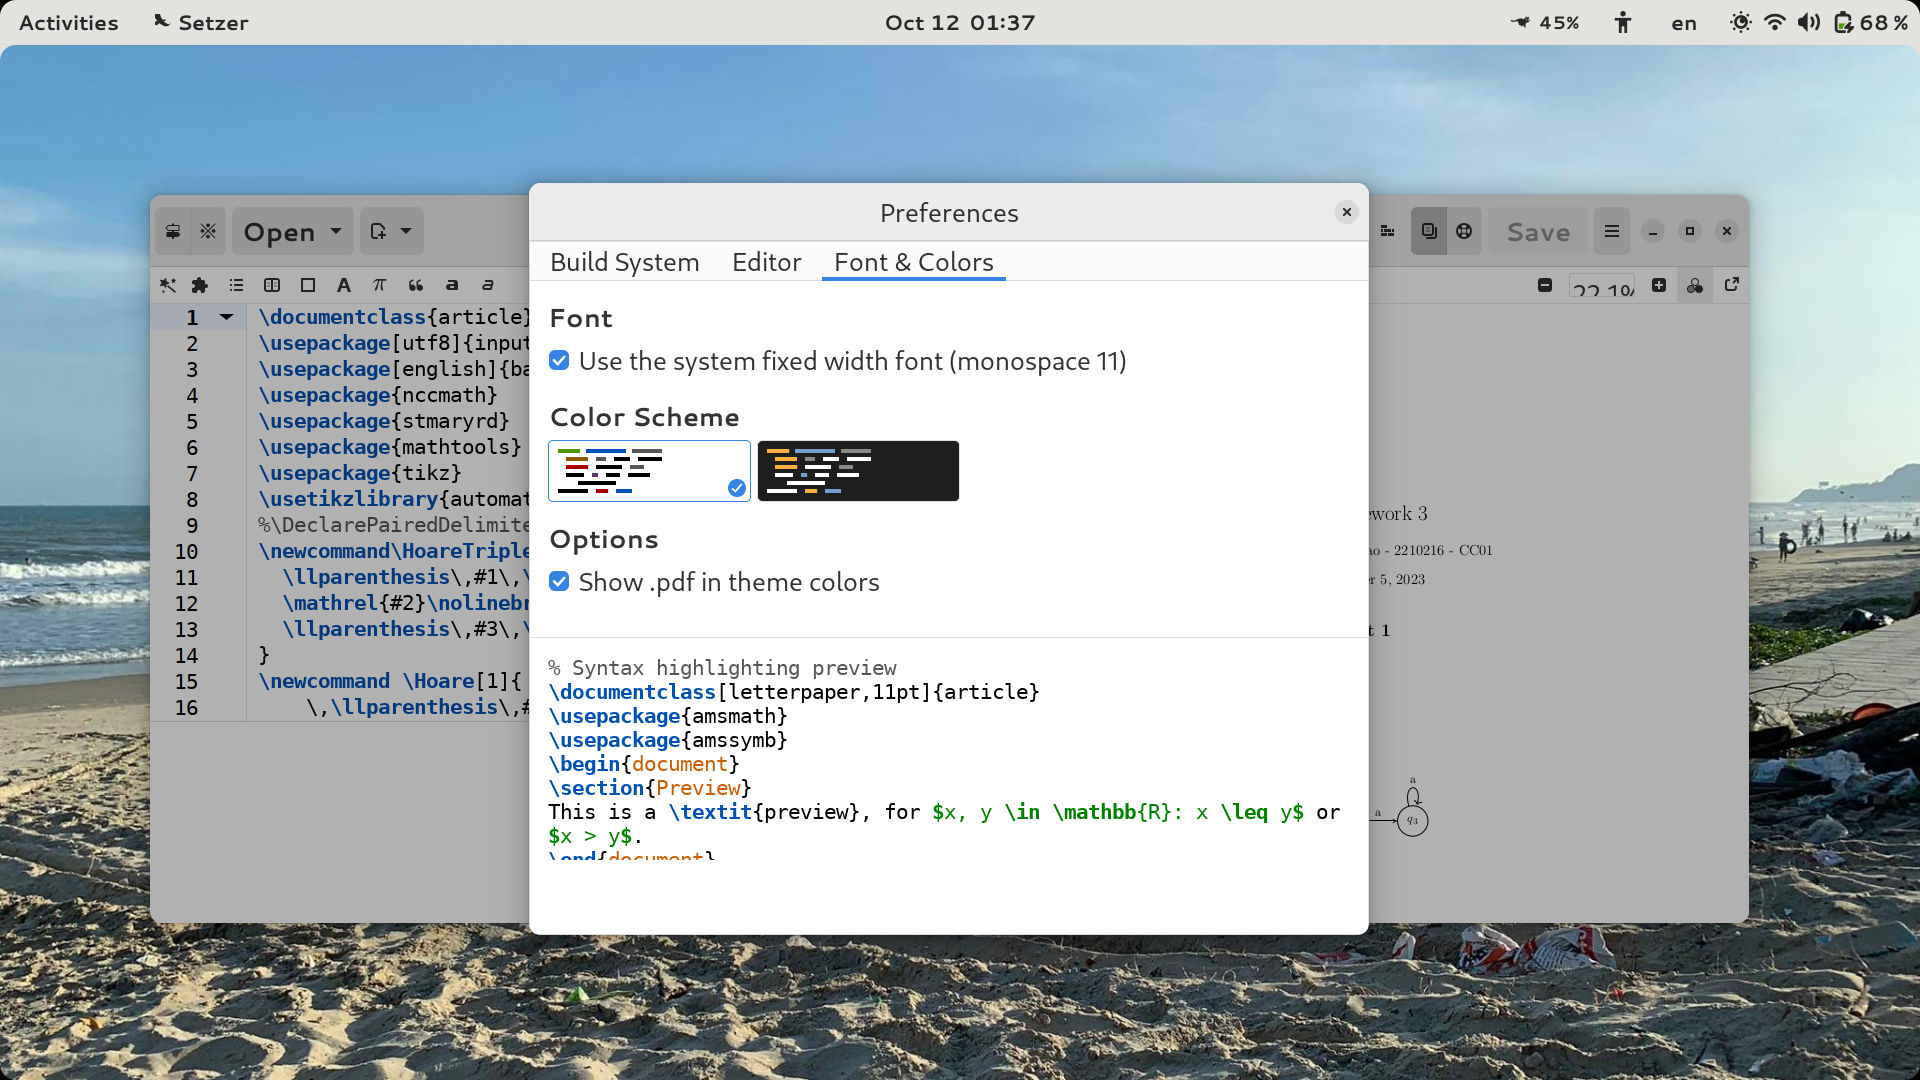
Below is the current Preferences window in Setzer:
Current Preferences window in Setzer.
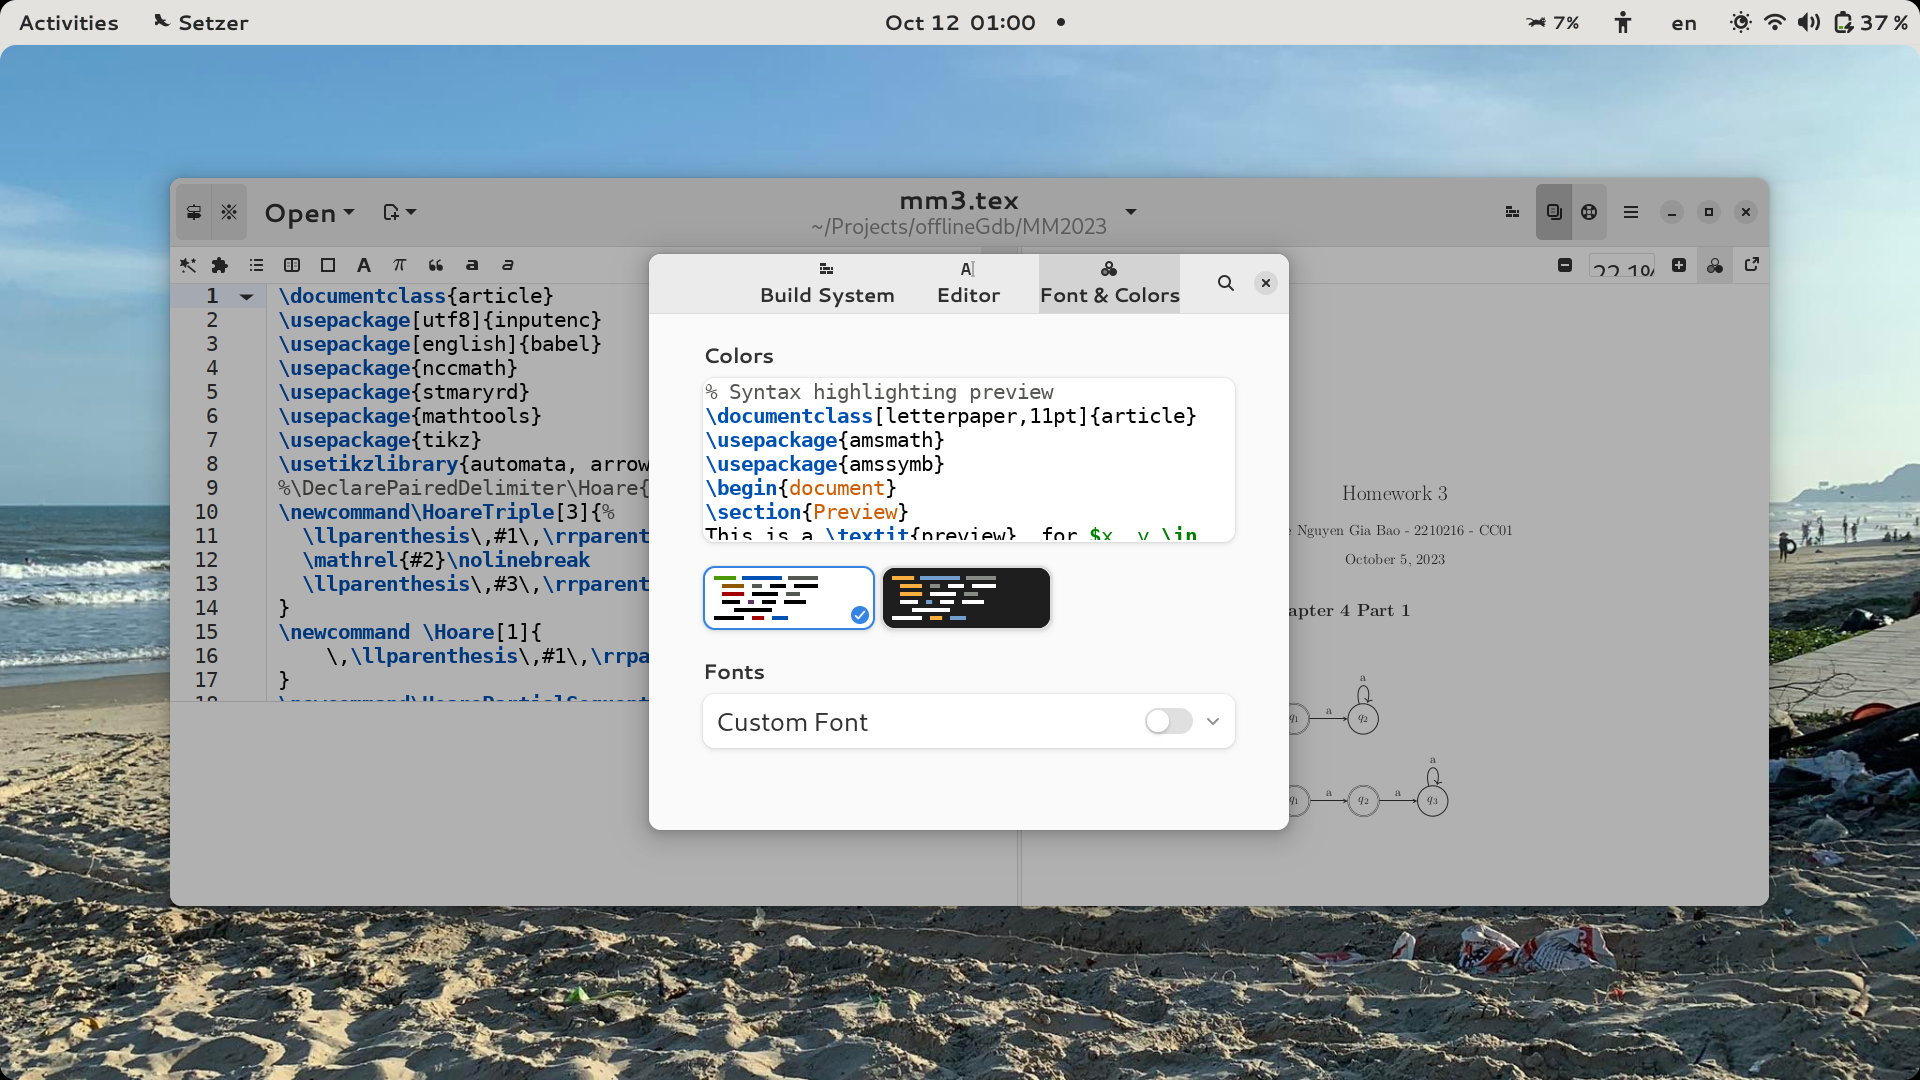
Here’s my new version. It’s all functional but here’s one page of the window for previewing’s sake. This version uses Adw.PreferencesWindow thus fixes a lot of layout issues:
New version of the preferences window.
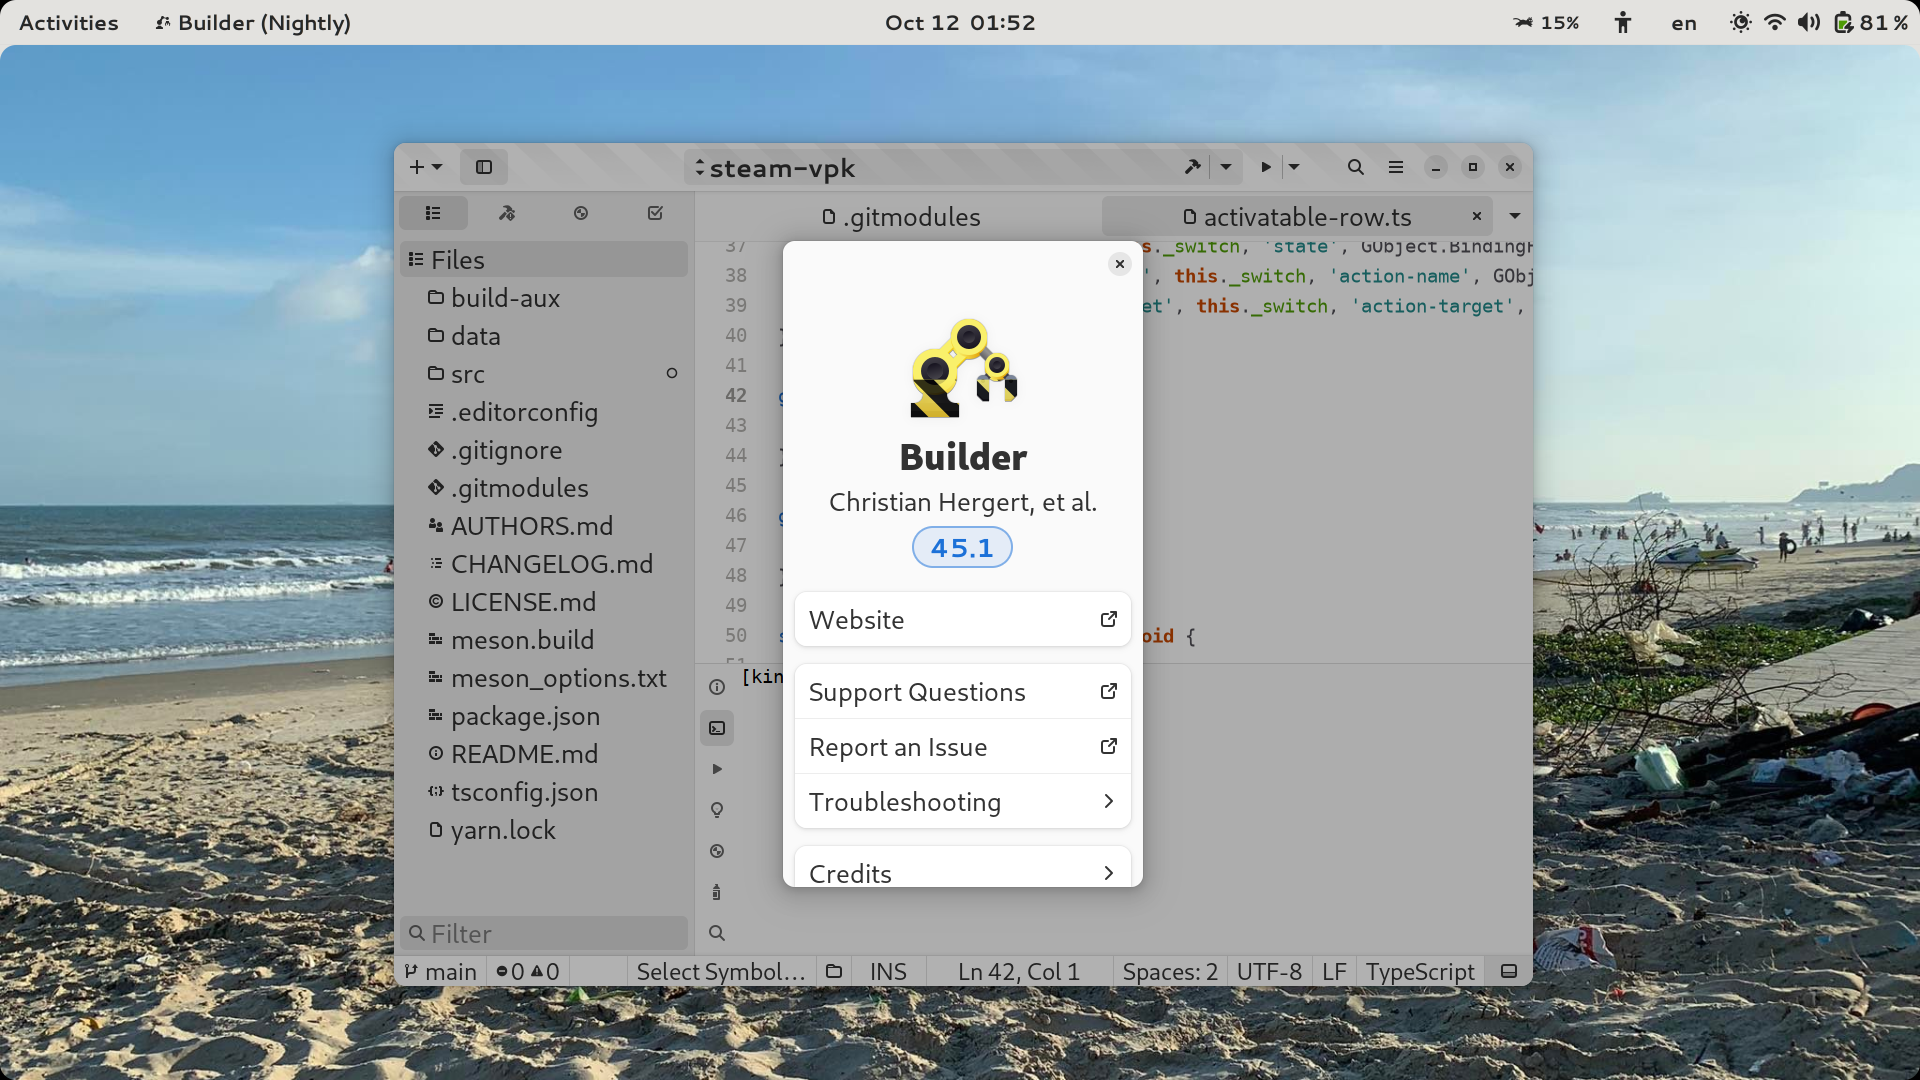
How about another comparison?. Here’s the About window in the GTK app GNOME Builder:
Again, cannot emphasize enough how most GTK apps today have this kind of window. There can be some variations, creative touches, but they mostly bear the same layout. There’s a sense of cohesion, because indeed you’re in one desktop environment.
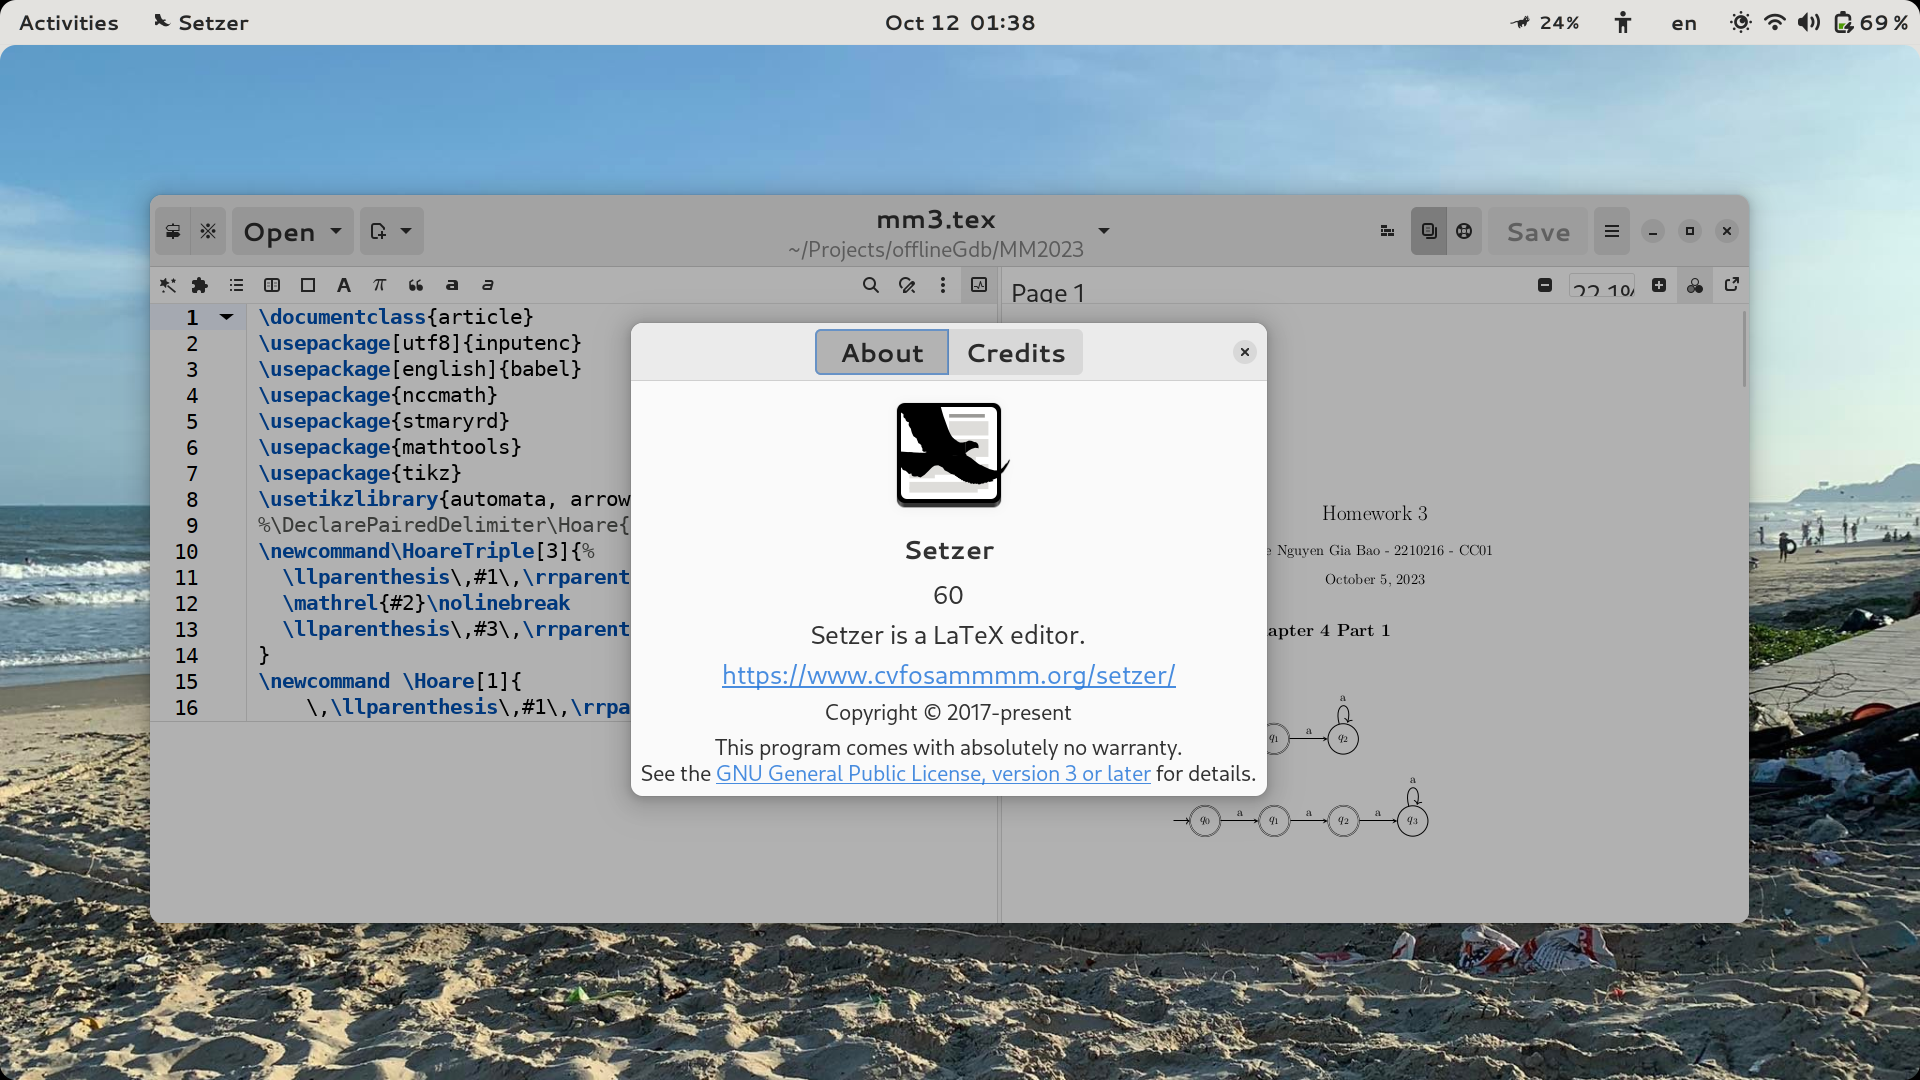
Here’s the current About window in Setzer.
Current About window in Setzer.
Here’s my version. Perhaps more info should be filled in as it looks quite empty:
New About window.
Also, somewhat related to my effort. I’ve recently requested the Setzer app icon to be Adwaita-ized in the MoreWaita project. As of the writing of this blog, a new Setzer icon has been added as an app icon theme, so try it out! Below are the old and new icons respective. Subtle changes, but the new version certainly has depth! (and been scaled into a square)
From left to right, old icon vs. new icon.
The Future
Upcoming feature is a new “Recently Opened Documents” popover. This is reimplemented from a popover in GNOME Text Editor that performs the same function. Originally Setzer also borrows the popover from GNOME Text Editor too, but ever since, that app has updated/been overhauled, while this app has not.
It should look like this, like in GNOME Text Editor:
Recently Opened Documents popover in GNOME Text Editor.
The Farther Future
I don’t know what’s the future for this fork/these commits. I do understand that when you accept a PR you must also accept maintaining it. Setzer uses a lot of hand-made UI solutions. Other GTK apps did this too but over the years the trend has been towards using default GTK widgets and patterns for stylistic consistencies. There are benefits to a hand-made solution, perhaps better syntax and/or performance, but so far these solutions have made the UI look worse. Again, don’t know how it is on Debian, but over here on vanilla GNOME it looks “pretty bad”. My forks so far have only addressed some of these issues, and there are a lot more to cover. Don’t know if I can make an adapter between custom API and default GTK API, a reconcilation?
Otherwise, this fork cannot run side-by-side with main repo forever.
My desire to extend some APIs led me to the builder pattern, and I love it!
Been working in the GTK framework, and I’ve noticed how the doc fails in some areas. So I was thinking of extending some parts of the API. Specifically, I want to create some objects in a correct and less repetitive way.
I can subclass, but I’ve never been a fan of OO. Instead, I want to write helper functions. To this end, there are some approaches. But most interestingly, I can write “builders”.
The idea came to me when I was reading the source code of the app Fractal. Fractal was written in Rust with gtk-rs. I realized how builder objects were used everywhere in gtk-rs. Here’s a snippet:
I quickly took an interest in these “builders” and the builder pattern overall. I haven’t used this pattern enough, if ever, only heard of. So I went ahead and wrote some Javascript builders for GTK widgets and objects.
Most of the time I rely on the constructor method to set up the object:
Here the API gave me Gtk.Application. It doesn’t do what you want, so you must implement your own Application-esque class basing off of this class. Methods .setupActions and .setupShortcuts and .setupStylesheet are my extended procedures that run in Application’s construction. This is subclassing. I would often subclass some widgets and add custom procedures.
A lot of APIs are intentionlly limited in functionality. They are blank slates so that you can then customize to your own needs. But couldn’t they just do a bit more work so that I don’t have to write duplicated code all the time?
Take Adw.MessageDialog for instance. You can’t add responses as constructor parameters (a response is a struct with two string fields, id and label), even if you can designate the default response’s id and such. You have to call dialog.add_response after construction. And you must do this for every response you want to add.
const dialog = new Adw.MessageDialog({
  heading: 'Delete this?',
  body: 'All data will be lost.',
  // a "responses" prop is sadly unavailable. In theory, we can do something like
  // responses: [{ id: 'res::ok', label: 'OK' }, ...],
});
// instead, you have to add responses manually:
dialog.add_response('res::ok', 'OK');
dialog.add_response('res::cancel', 'Cancel');
dialog.add_response('res::retry', 'Retry');
// ...
dialog.show();
The process where you do some extra post-processing work after object construction in order to get a desirable object… let’s call this process “assembling”.
So construction isn’t enough; GTK forces you into this assembling pattern after construction. Of course this may be intentional because in some way it’s not so bad. At least your code is now imperative, you’re seeing the making of the object yourself. In other words, it’s very transparent.
But I also dread having to write these code. Some of them aren’t so bad, but some really are. There are times when the parameter for a function is involved, you have to do a lot of set-up work. You create functions and variables that only serve during this set-up process and cannot be reused after this…
const child_1 = new Widget(1);
validateWidget(child_1);
dialog.add_extra_child(child_1);

const child_2 = new Widget(2);
validateWidget(child_2);
dialog.add_extra_child(child_2);

// ...
The solution? Oftentimes I will subclass widgets like Adw.MessageDialog and let the construction do all the work:
You don’t see what’s happening during construction. It’s an encapsulated procedure. Sometimes it’s good to have encapsulation, but in this case I don’t want it.
I don’t like abusing the constructor method. Every time you add a feature, you not only add more variables to the class but also append more code to the constructor method. You may group codes into sub-functions, but you still have to call these functions from the constructor method. They are all part of one long execution flow. This doesn’t scale up well.
class MyMessageDialog extends Adw.MessageDialog {
  constructor(param) {
    super(param);
    const responses = param.responses;
    const children = param.children;
    const val = param.val;
    this.addResponses(responses);
    this.addExtraChildren(children);
    this.addFeature(val);
    // ...
    // everytime you add some new procedures, you must explicitly mention them from here...
  }

  addResponses(responses) {
    responses.forEach(x => {
      this.add_response(x.id, x.label);
    });
  }

  addExtraChildren(children) {
    children.forEach(x => {
      if (this._private_checkValidChild(x))
        this.add_extra_child(x);
    });
  }

  addFeature(val) {
    // ....
  }
}
Overall that’s not the responsibility of the construction process. Construction is about doing the minimal set-up work so that you can access the object with safety. By then you should have only a barebone object. You can use it, things won’t crash, but you won’t get the features you desire, and that’s right. It’s not right to expect a fully desirable object right after one construct expression.
The builder pattern solves this problem. It simply makes assembling less painful, reducing code duplication. It combines the best of both worlds: the cleanness of setting up objects in one expression, and the transparency of an assembling process.
class MessageDialogBuilder() {
  instance;

  constructor() {
    this.instance = new Adw.MessageDialog();
    // no reference to response or extraChild()!
  }

  build() {
    return this.instance;
    // no reference to response or extraChild()!
  }

  response(param) {
    this.add_response(param.id, param.label);
    return this;
  }

  extraChild(widget) {
    this._private_checkValidChild(widget);
    this.add_extra_child(widget);
    return this;
  }

  _private_checkValidChild(widget) {
    // ...
  }

  prop(val) {
    // ...
  }
}

const dialog = MessageDialogBuilder()
  .response('res::ok', 'OK')
  .response('res::cancel', 'Cancel')
  .response('res::retry', 'Retry')
  .extraChild(new Widget(1))
  .extraChild(new Widget(2))
  // ...
  .build();
dialog.show();
Every method in the builder class returns an reference to itself. This allows you to chain up commands, until you reach .build where the final product is returned.
Also, notice how I now use a .response method, instead of .responses. Now I don’t have to input an array type! OFC, you may prefer array type, but at least we now have more options.
In comparision, it’s impossible to do this with subclassing because each prop in an object must be unique. If there are duplicate props, the one comes later will override the one comes earlier.
The sequence of these methods also matter. Imagine a .validateChildren method:
MessageDialogBuilder()
  .extraChild() // add child to a this.children variable
  .extraChild()
  .extraChild()
  .validateChildren() // validate all children saved in a this.children variable!
  // ...

MessageDialogBuilder()
  .validateChildren() // error, this.children is empty!
  .extraChild()
  .extraChild()
  .extraChild()
  // ...
Note that I haven’t read any book or doc on this pattern and it’s rationale. I visited wikipedia to see what they have to say about the builder pattern. My idea’s there, but there’s also something about subclassing the builder, and how swapping builders results in different objects even with the same assembling sequence. Sure, but I don’t think my code is getting there yet. And so is the Fractal code. I only enjoy the transparency part.
Design patterns are cool tools to learn, and they will help us if we use them right. But to know when it is right to use, you have to use the design pattern without knowing it. Most of the time, you won’t use these patterns at all. There are so many rules to these patterns that you may get distracted after reading.
In my opinion, this is true for all engineering styles and patterns. You just have to get your hands dirty!
I am kinten108101, also known by my real name Le Nguyen Gia Bao. I am a software engineer who loves to discuss UX. This is where I showcase my works and share my thoughts on various topics!